

Overview
The order form builder lets you design exactly the form your customers fill out — instead of a generic “all products” list. Drag in the fields you want, reorder them, add photo swatches for cake sizes or flavors, and brand the whole thing to match your storefront. Every change saves as you go, and it’s available on every plan.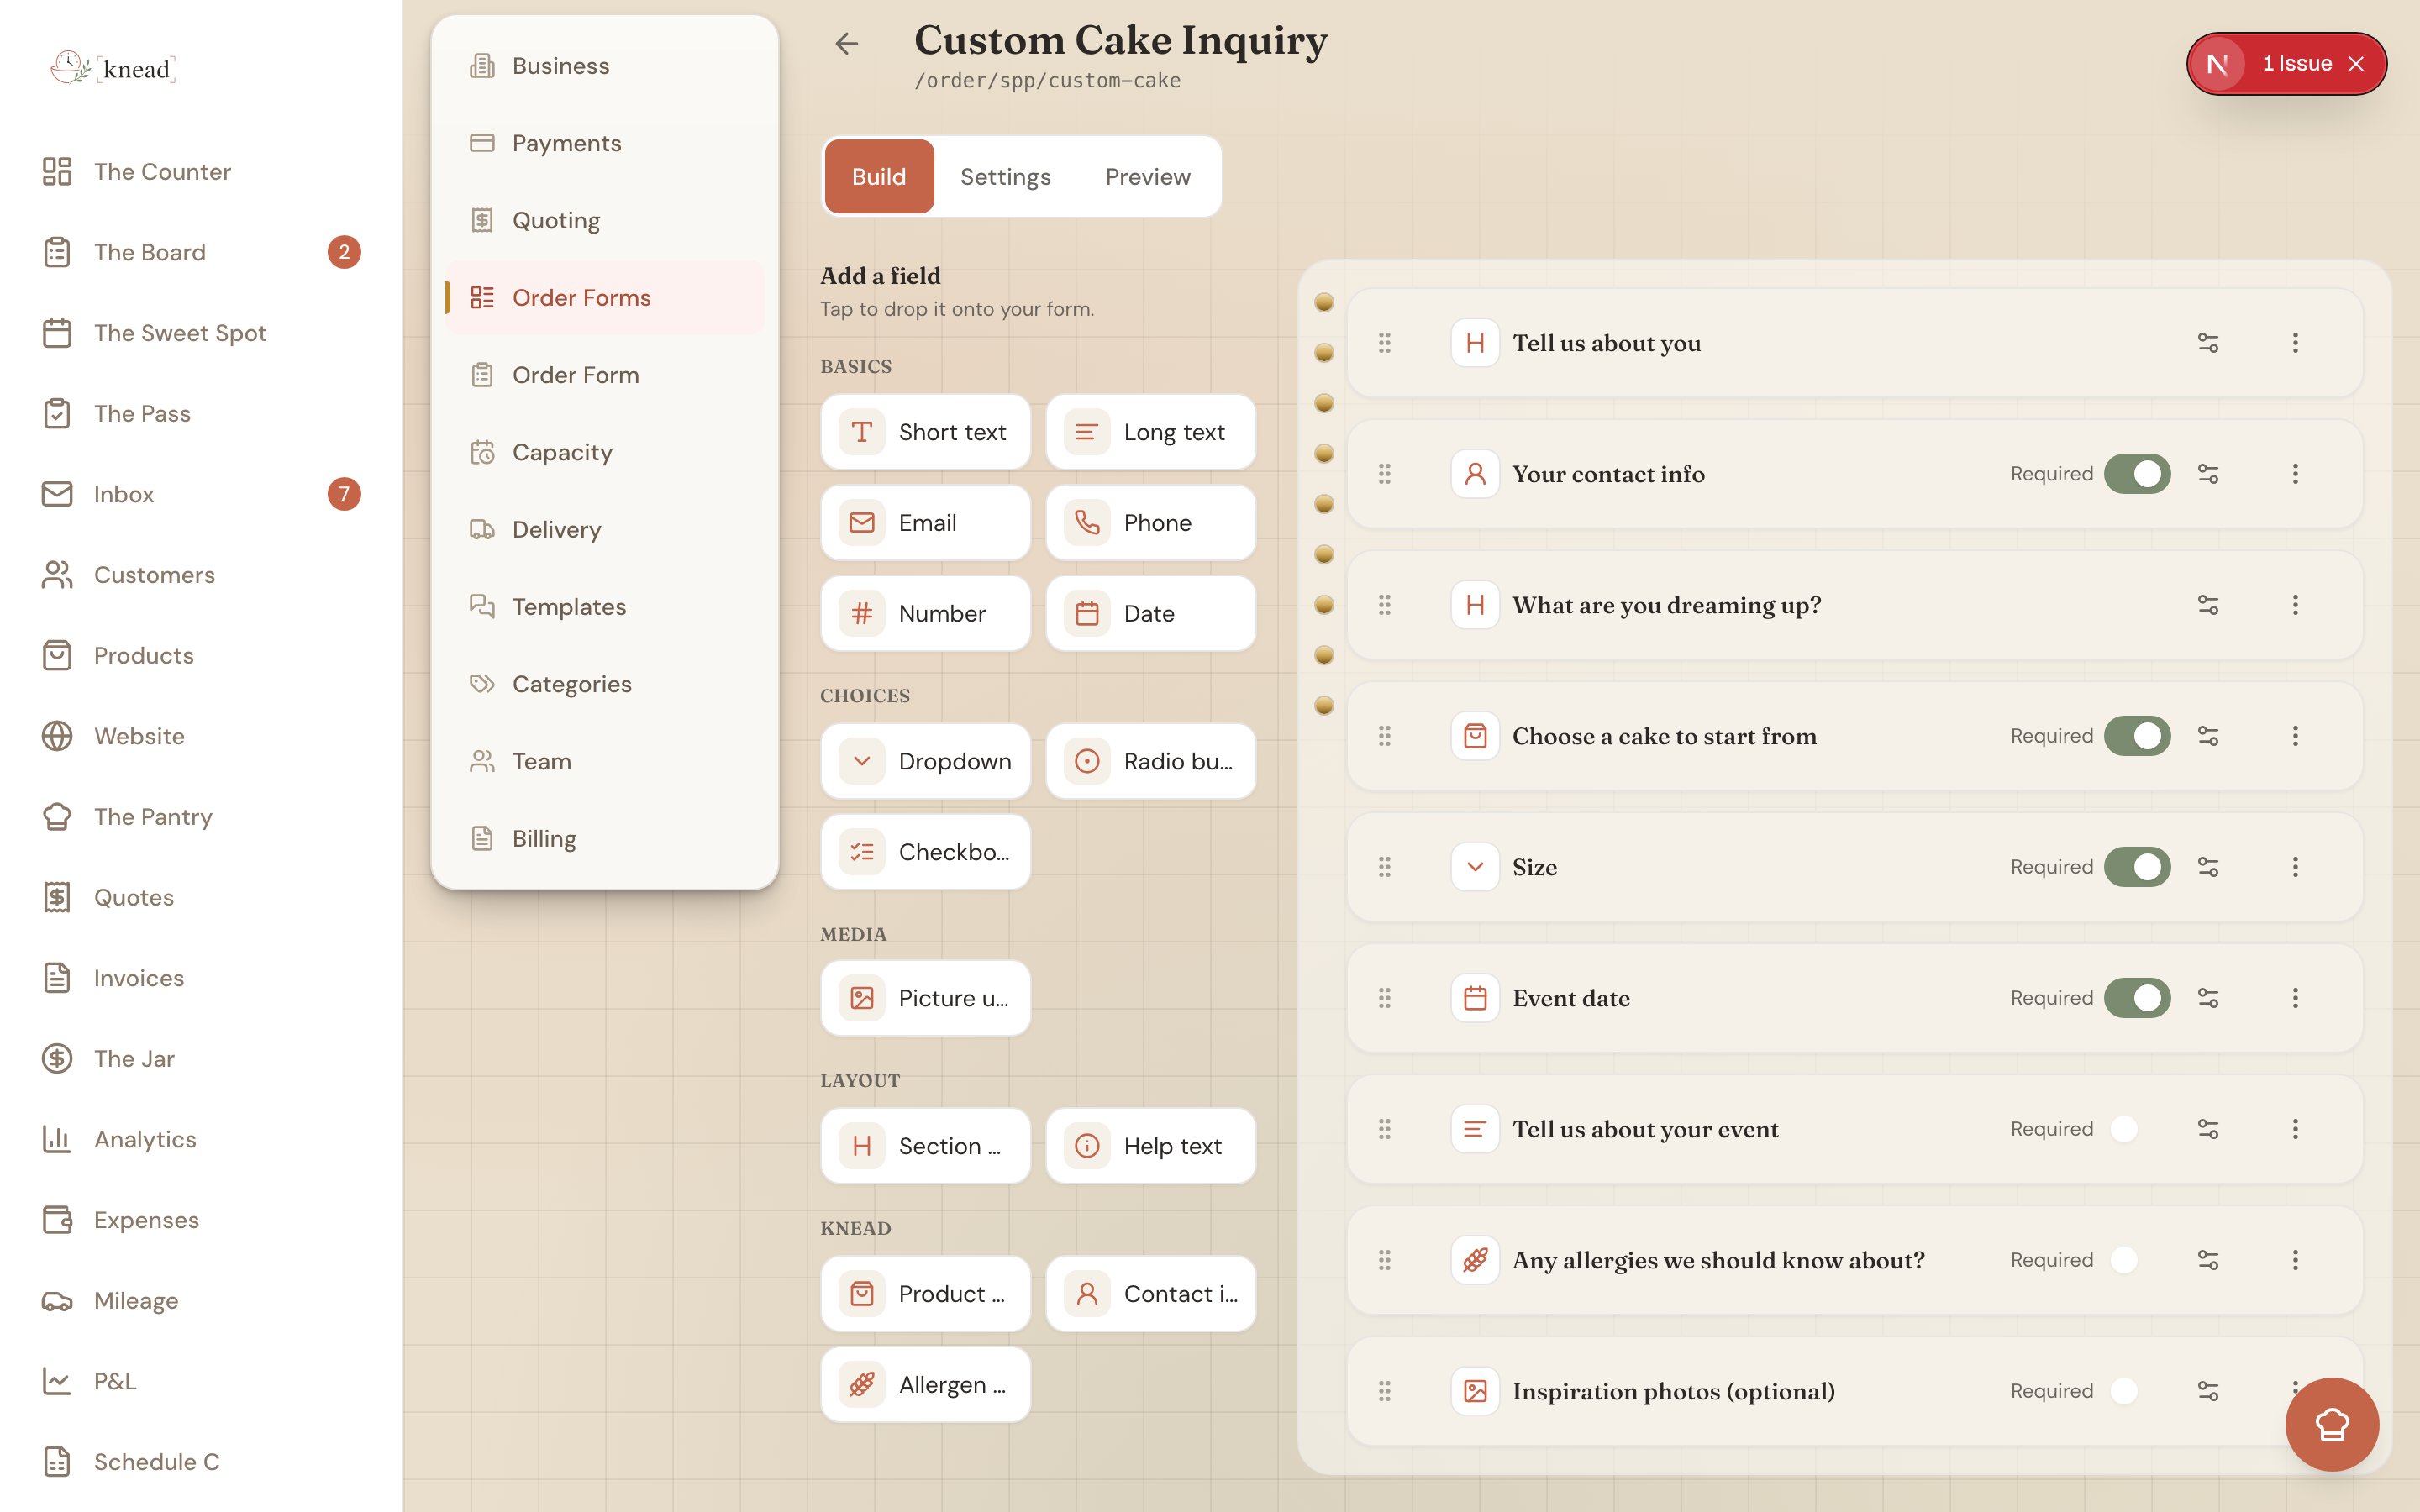
Where to Find the Builder
- Tap Settings in the main navigation.
- Open Order Forms (
/settings/order-forms). This is where all your forms live as a card grid. - Tap a form (or New form) to open the builder at its own page.
Good to know: Two settings pages have similar names. Order Forms (plural) is where you build and manage your forms — that’s this article. Order Form (singular) is a separate page for your public form and availability settings. Head to Order Forms to use the builder.
The Build Tab
The Build tab is where you assemble the form. On the left is a field palette — every field type you can add. On the right is the canvas, the live list of fields your customers will see. Drag a field from the palette onto the canvas, then drag fields up and down to reorder them. Every change autosaves. You’ll see “Saving…” flip to “Saved” in the corner — there’s no separate save button to remember. If a form is empty, the canvas offers “Start from the standard order form” — one tap drops in a sensible set of fields (contact info, a product picker, a date, and a notes box) that you can then tweak.Editing a Field
Tap any field on the canvas to edit it. Every field has:- A label — the question or heading your customer reads.
- Help text — an optional line of guidance under the label.
- A required toggle — turn it on to make the field mandatory before a customer can submit.
- Duplicate — copy the field, settings and all.
- Delete — remove it from the form.
The 15 Field Types
Fields are grouped in the palette so they’re easy to find:
The Knead blocks are the smart ones. Product picker pulls in your real catalog so customers order actual products at your real prices. Contact info collects name, email, and phone in one tidy block. Allergen flags lets customers tell you about dietary needs up front.
Per-Field Settings
Some fields have extra options once you add them:- Number — set a minimum, maximum, and step.
- Date — set a minimum lead time (days) so customers can’t request a date sooner than you can bake.
- Picture upload — set the max images a customer can attach.
- Dropdown, Radio buttons, Checkboxes — an options editor where you type each choice, and each option can carry a photo.
- Product picker — choose a list or swatch layout and pick exactly which products to include.
Photo Swatches
Give a choice option (or a product in your Product picker) an image, and instead of plain text the choices render as tappable picture swatch cards on the public form. This is perfect for anything visual — cake sizes, flavors, frosting colors, or icing styles. To set it up:- Add a Dropdown, Radio buttons, or Checkboxes field (or a Product picker set to swatch layout).
- In the options editor, add a photo to each option.
- Open the Preview tab to see the swatch cards.
The Settings Tab
The Settings tab controls how the form looks and behaves: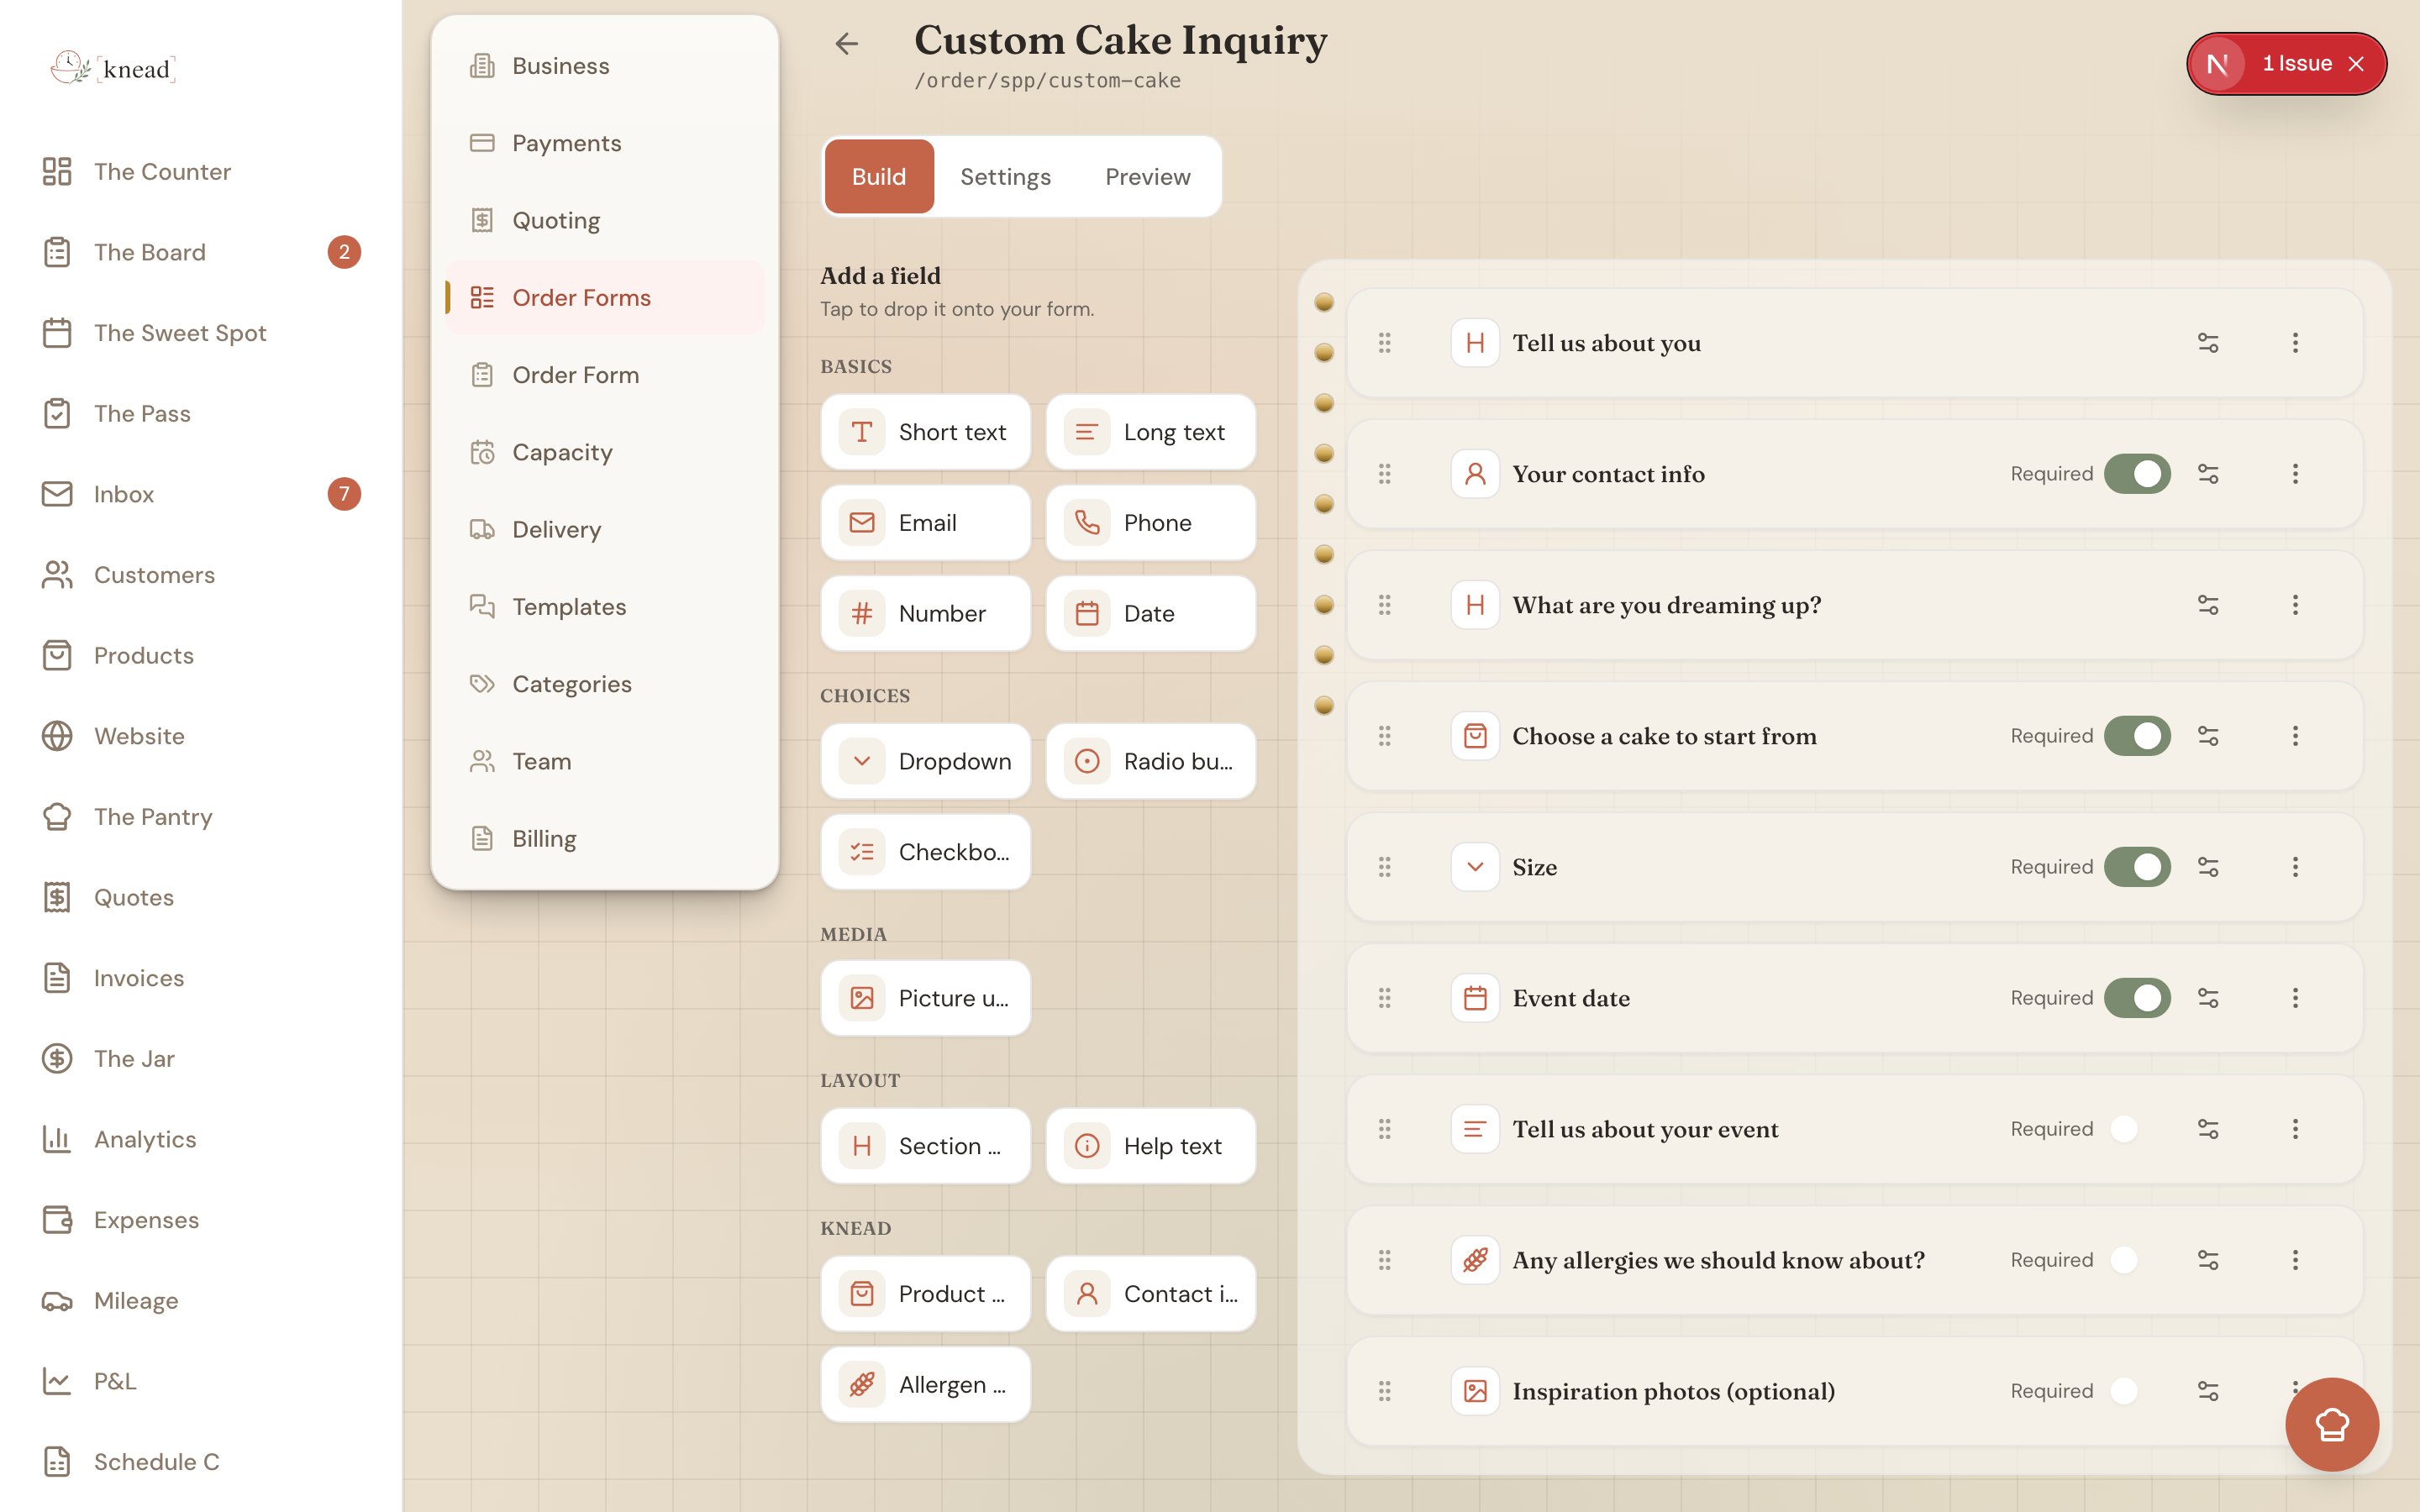
- Live / paused toggle — turn the form on or off for customers.
- Form name — what the form is called in your list.
- Link / slug — the address customers visit. Your default form’s slug is fixed; extra forms get their own.
- Header image — a banner across the top of the form.
- Accent color — the button and highlight color, so the form matches your brand.
- Intro text — a short welcome shown above the fields.
- Success message — what customers read on the thank-you screen after they submit.
The Preview Tab
The Preview tab shows the form exactly as customers will see it — branded, with your header image, accent color, and any photo swatches. It’s read-only, so it’s the safe way to sanity-check your build before you share the link.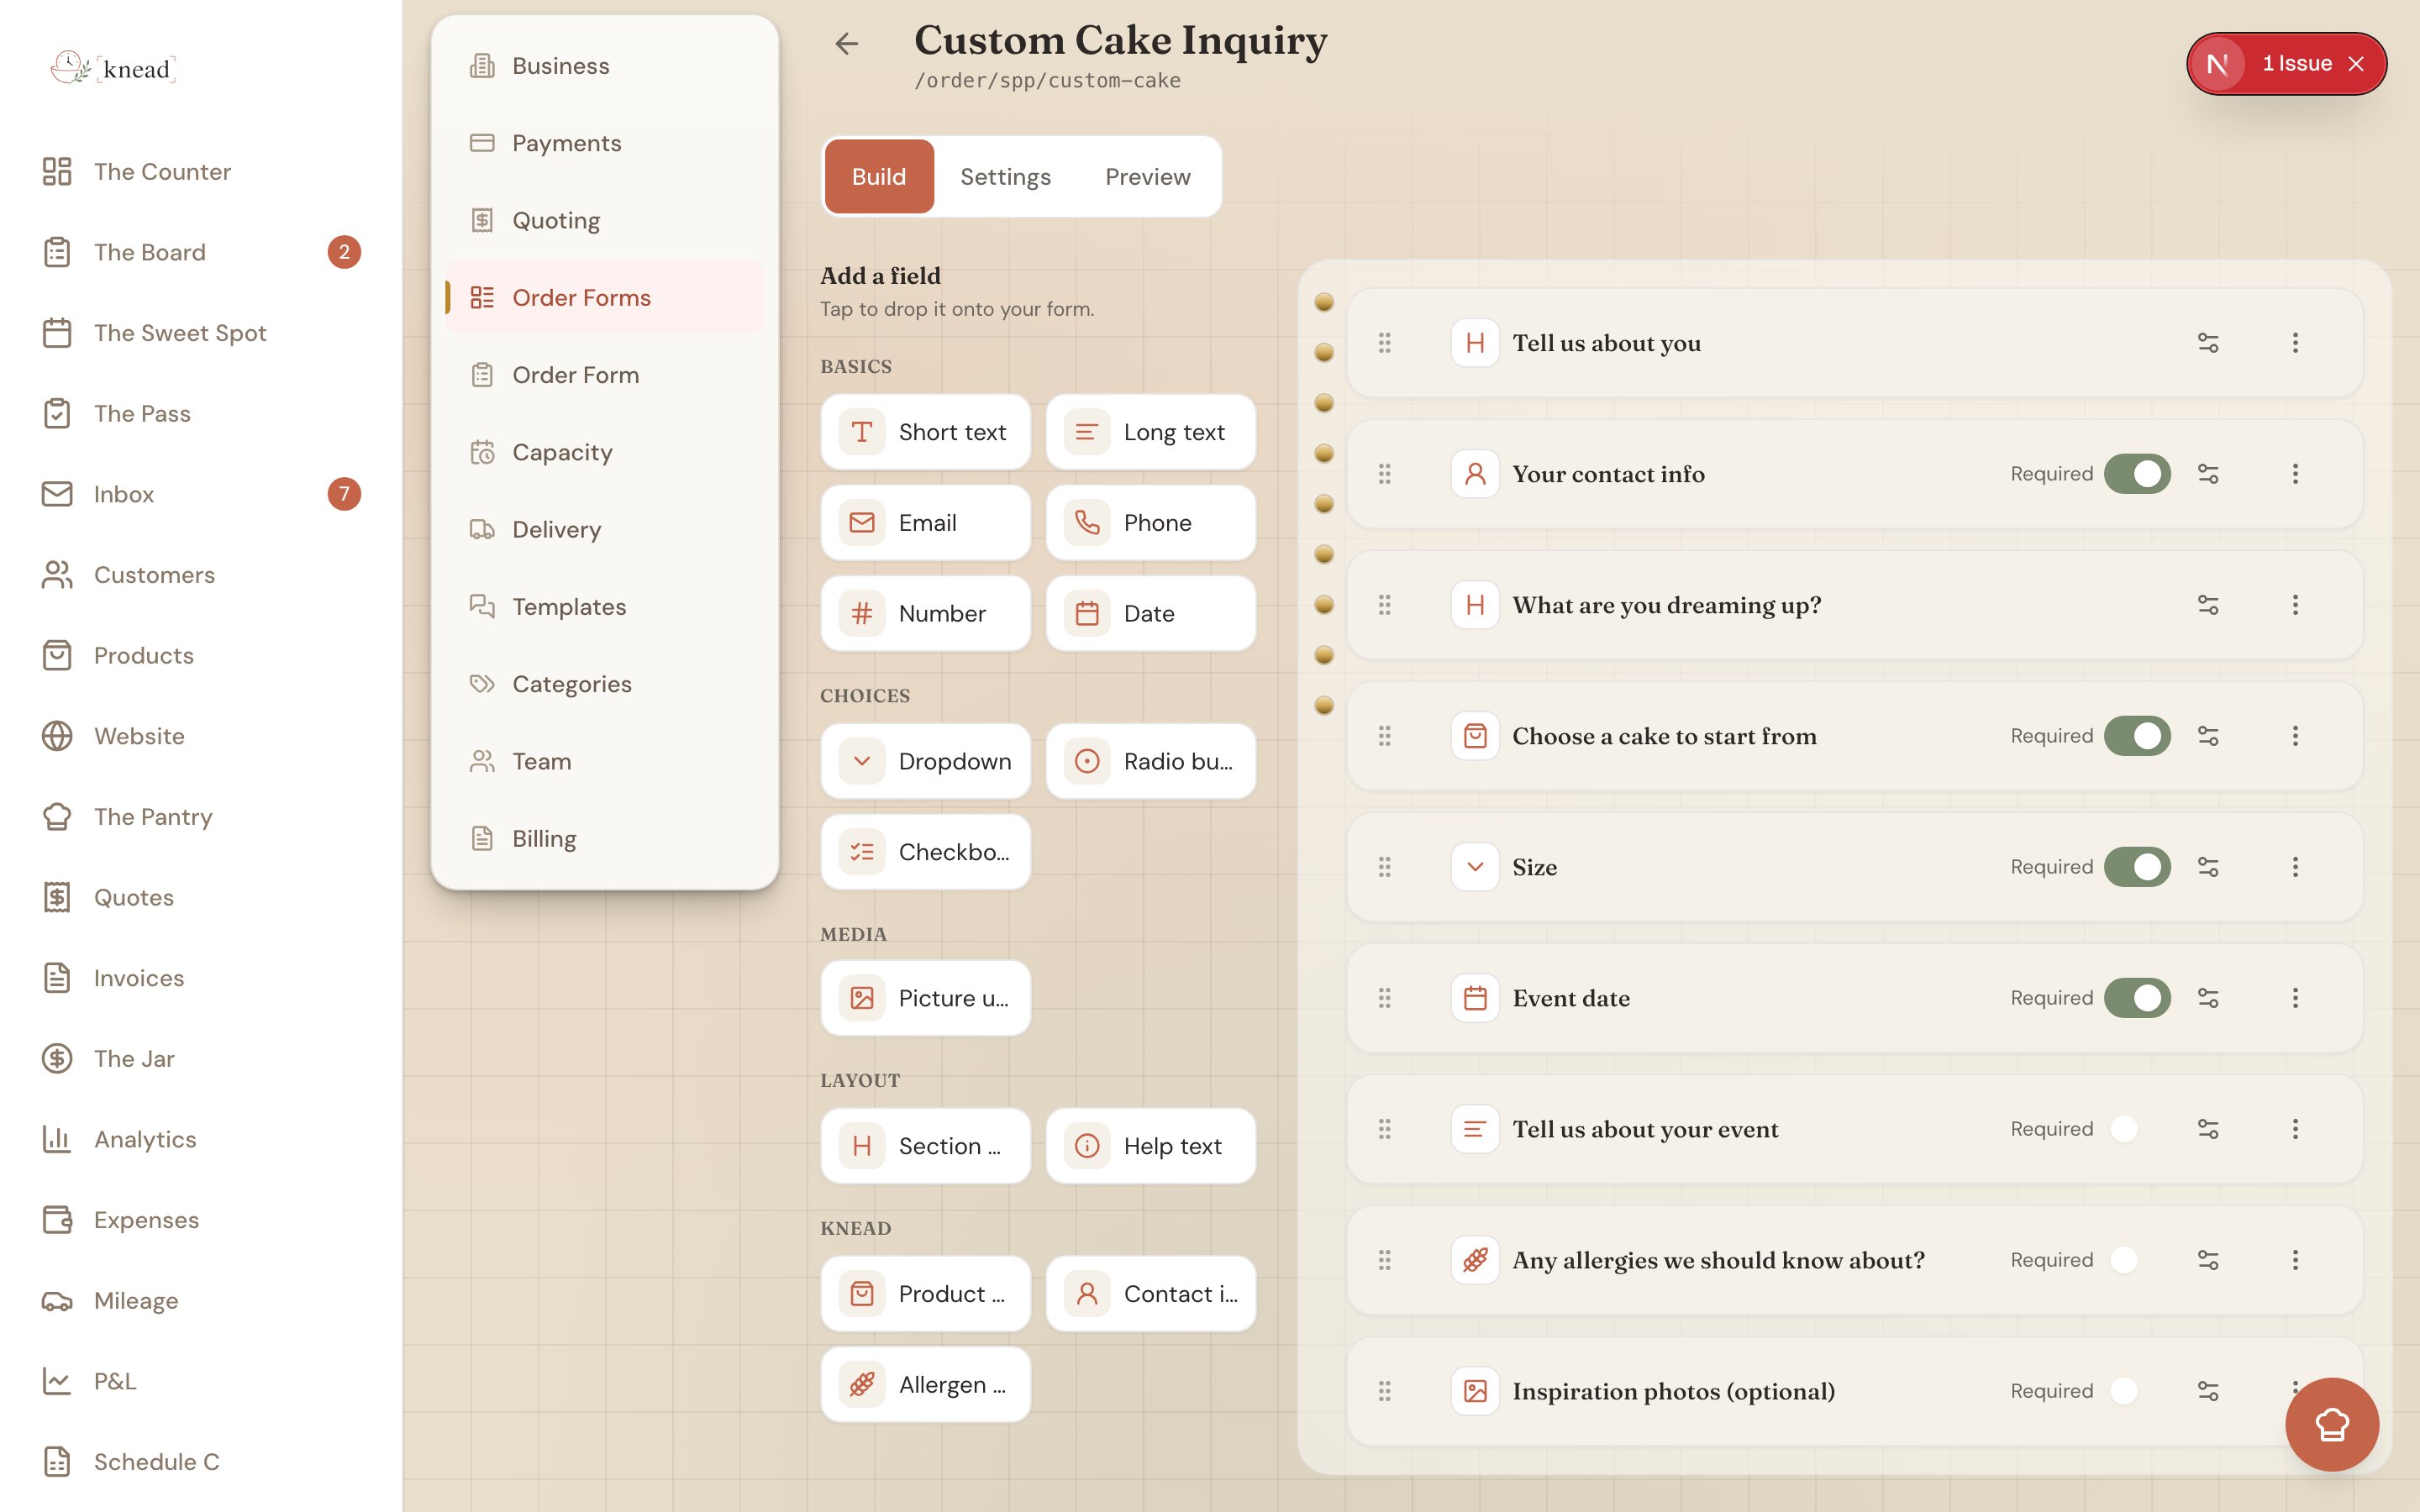
What Customers See
When a customer opens your link (/order/{slug} for your default form, or /order/{slug}/{form-slug} for any extra form), they get the form you built — branded to match your storefront.
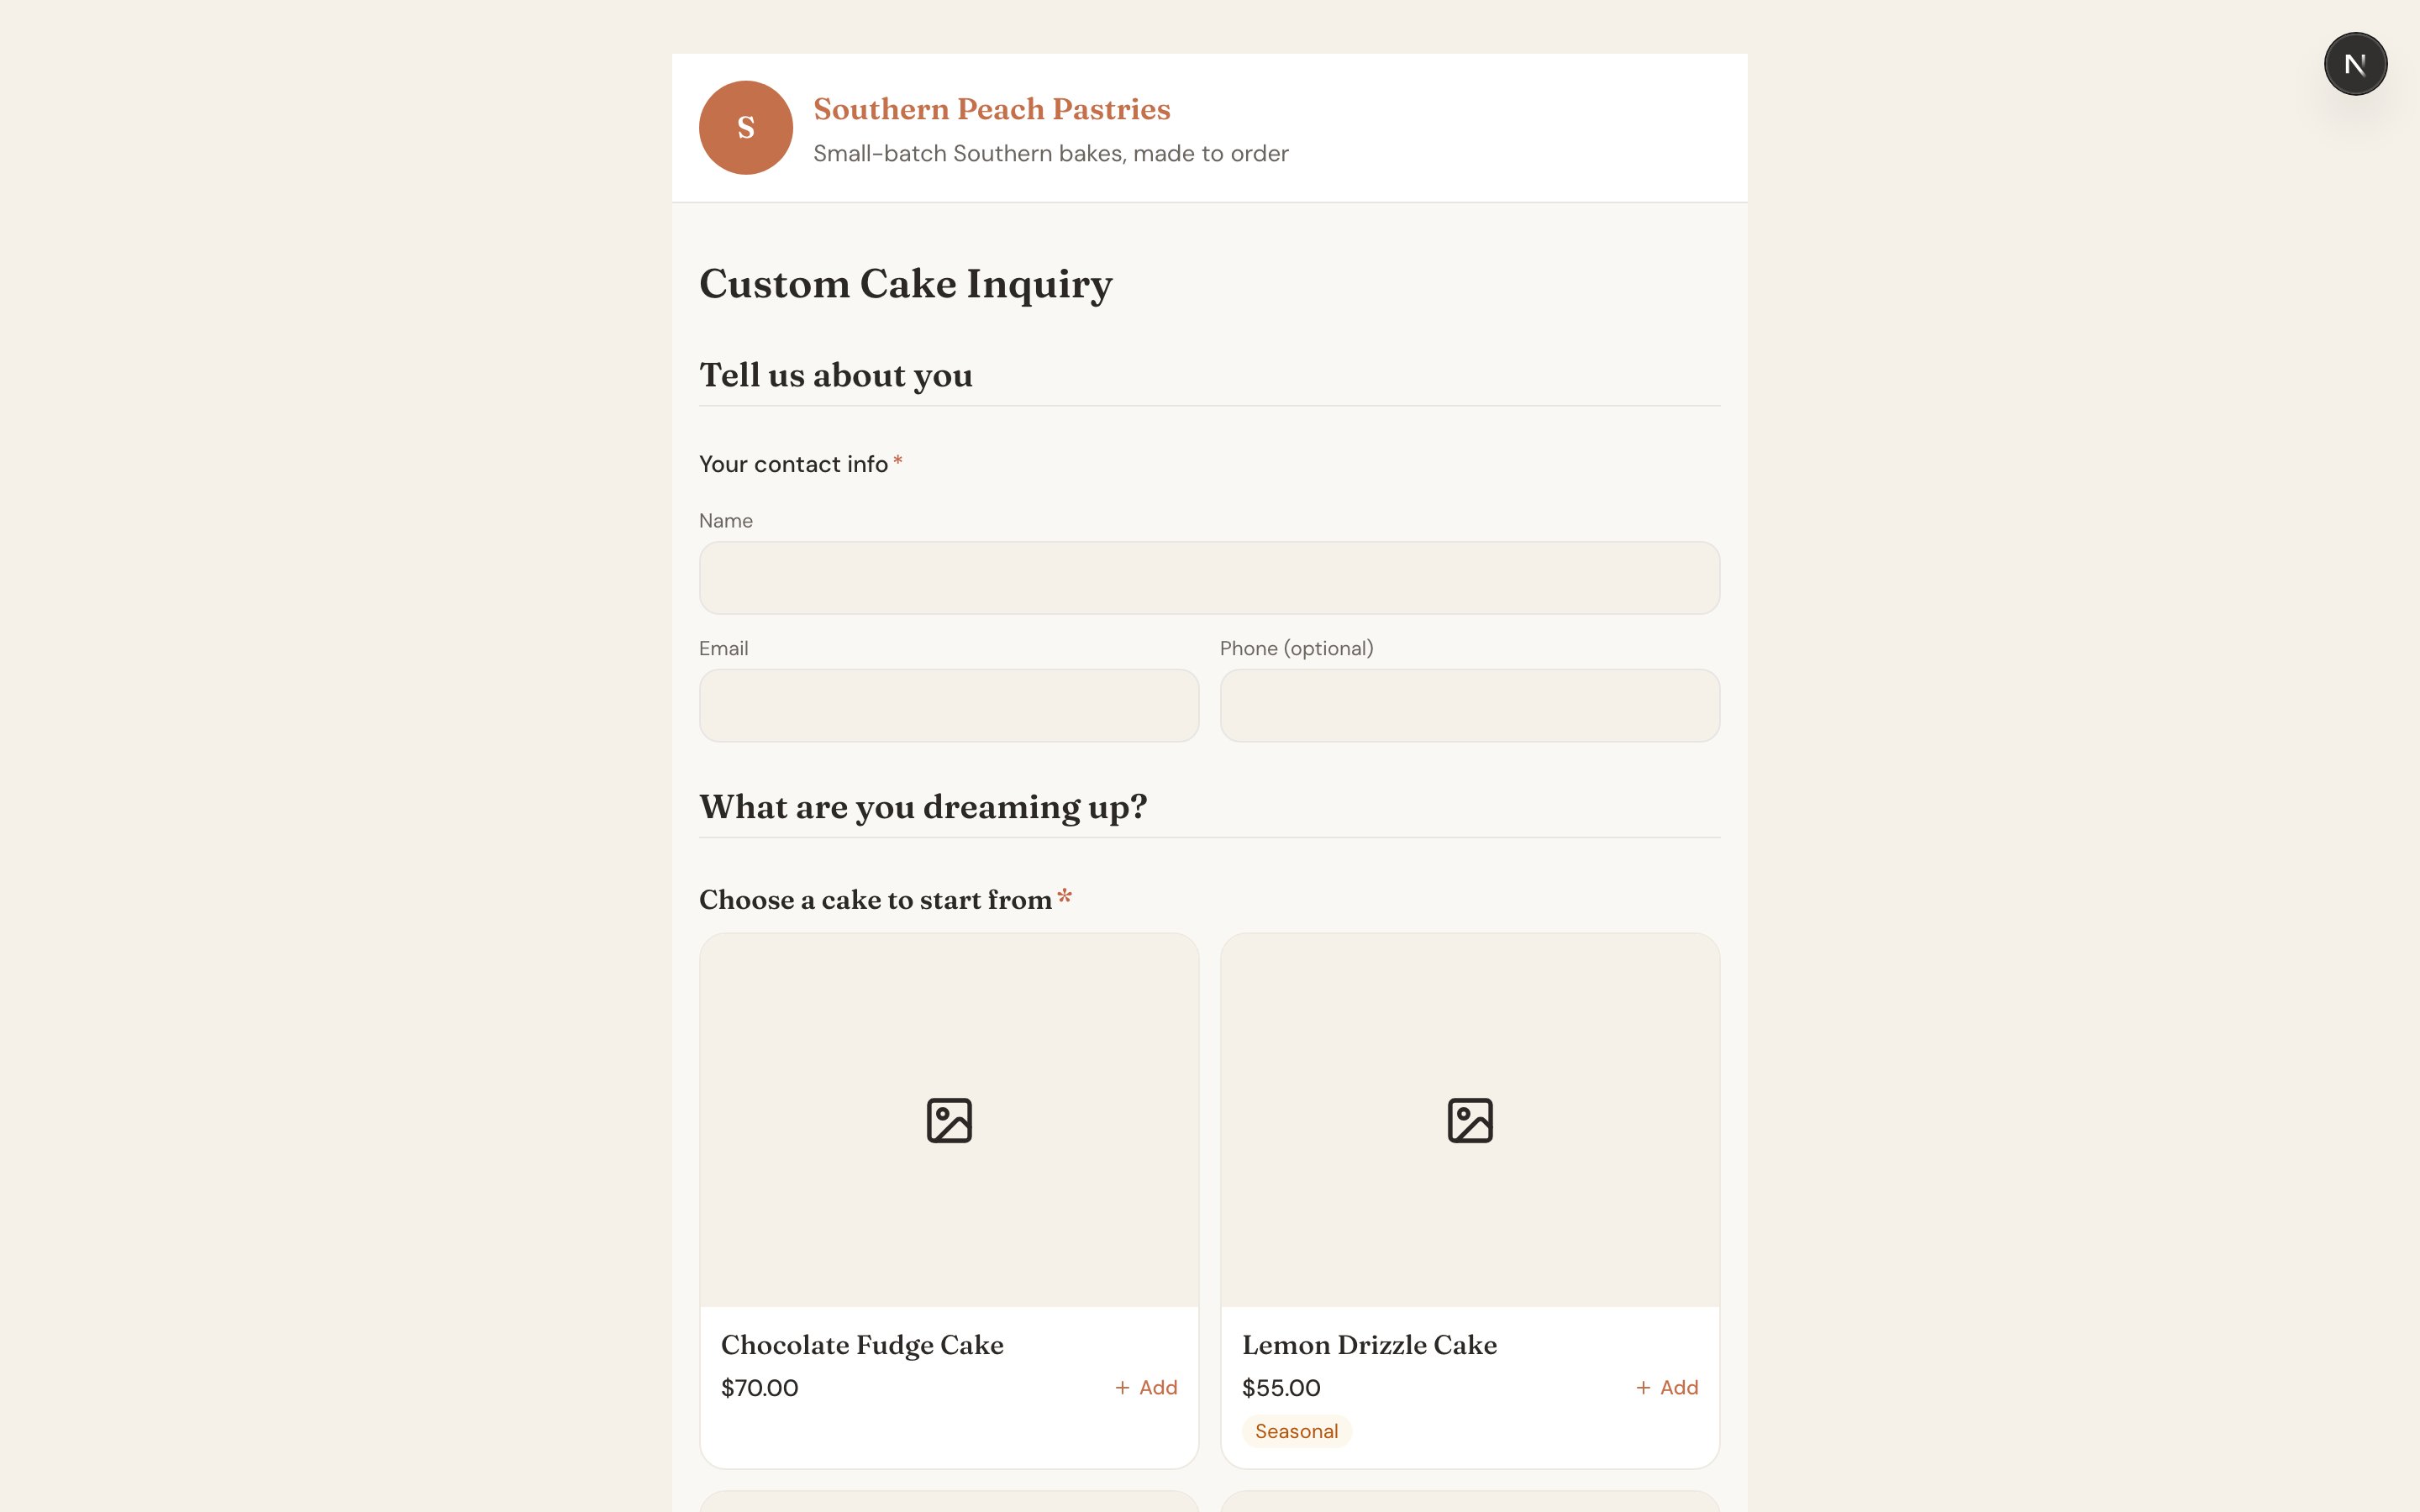
- Required fields are validated, so customers can’t submit until the important ones are filled in.
- When they submit, they land on a branded thank-you screen showing your success message, and the enquiry drops into your Counter for review.
- If the form is paused, customers see “This form isn’t taking orders right now” instead of the fields.
Related Articles
- Running Multiple Order Forms
- How The Board Works
- Sharing Your Order Link
- Building Your Product Catalog
- Your Online Storefront
- Reviewing and Accepting Enquiries
Still need help? Contact us