> ## Documentation Index
> Fetch the complete documentation index at: https://help.kneadapp.co/llms.txt
> Use this file to discover all available pages before exploring further.
# Your First Order — End to End
> Follow an order from enquiry to delivery in Knead.
## Overview
Every order in Knead follows the same lifecycle: a customer submits a request through The Board, you review it, and the order moves through a series of statuses until it is fulfilled. This guide walks you through each stage.
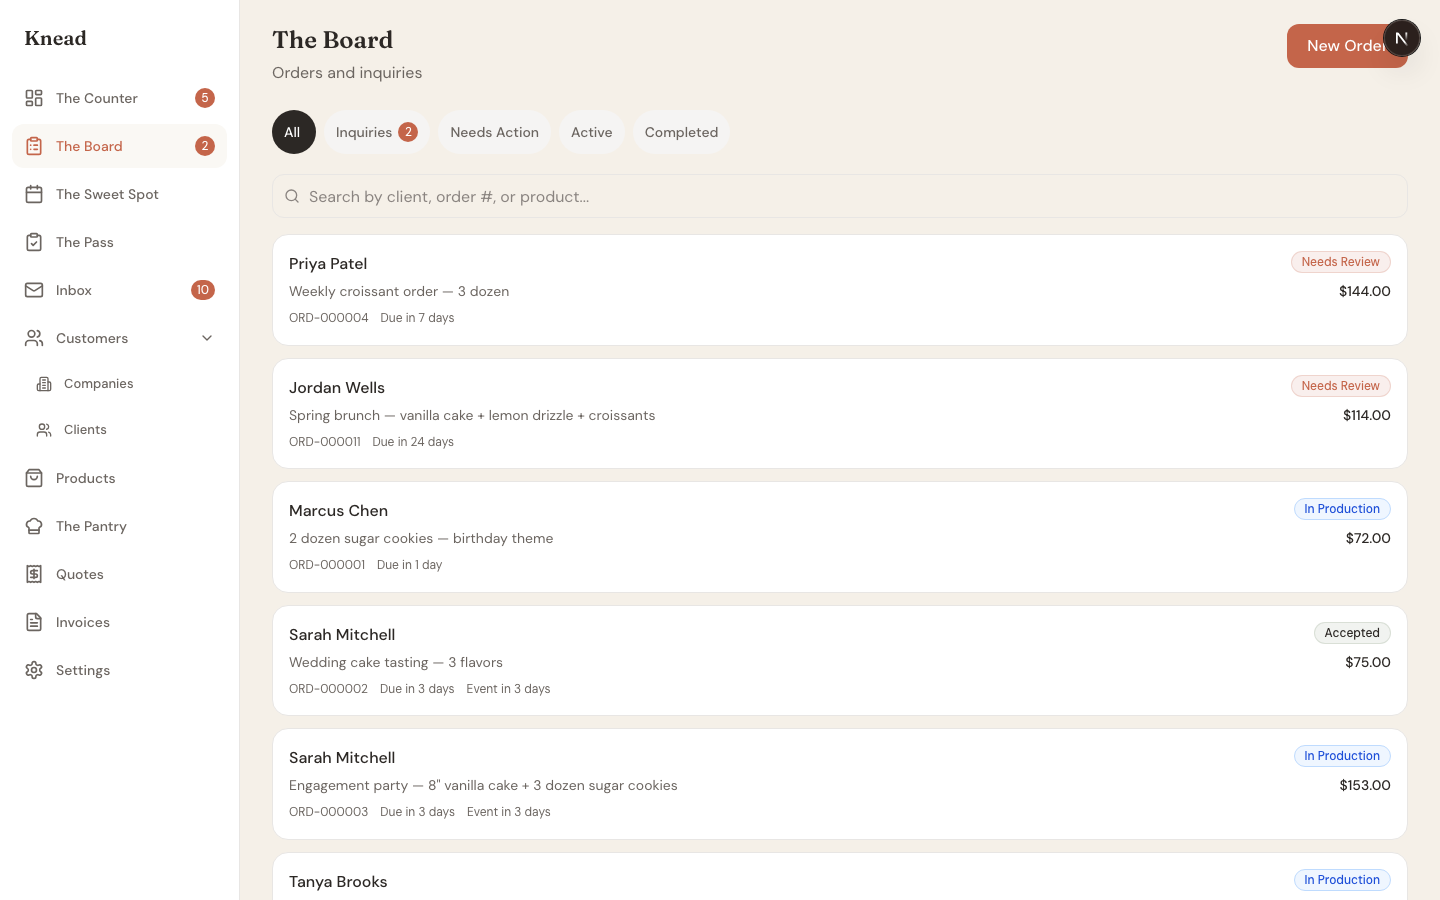 ## Stage 1: Customer Submits an Enquiry
A customer visits your Board link, browses your products, selects what they want, picks a date, and submits an order request. This lands in your orders list as an **Enquiry**.
You receive a notification when a new enquiry comes in. No commitment has been made yet on either side.
## Stage 2: Review the Enquiry
1. Tap **Orders** in the sidebar.
2. Find the new enquiry at the top of the list.
3. Tap the enquiry to open the details.
Review what the customer is asking for: products, quantities, variants, requested date, and any notes they included. Check The Sweet Spot if you need to confirm you have capacity for that date.
## Stage 1: Customer Submits an Enquiry
A customer visits your Board link, browses your products, selects what they want, picks a date, and submits an order request. This lands in your orders list as an **Enquiry**.
You receive a notification when a new enquiry comes in. No commitment has been made yet on either side.
## Stage 2: Review the Enquiry
1. Tap **Orders** in the sidebar.
2. Find the new enquiry at the top of the list.
3. Tap the enquiry to open the details.
Review what the customer is asking for: products, quantities, variants, requested date, and any notes they included. Check The Sweet Spot if you need to confirm you have capacity for that date.
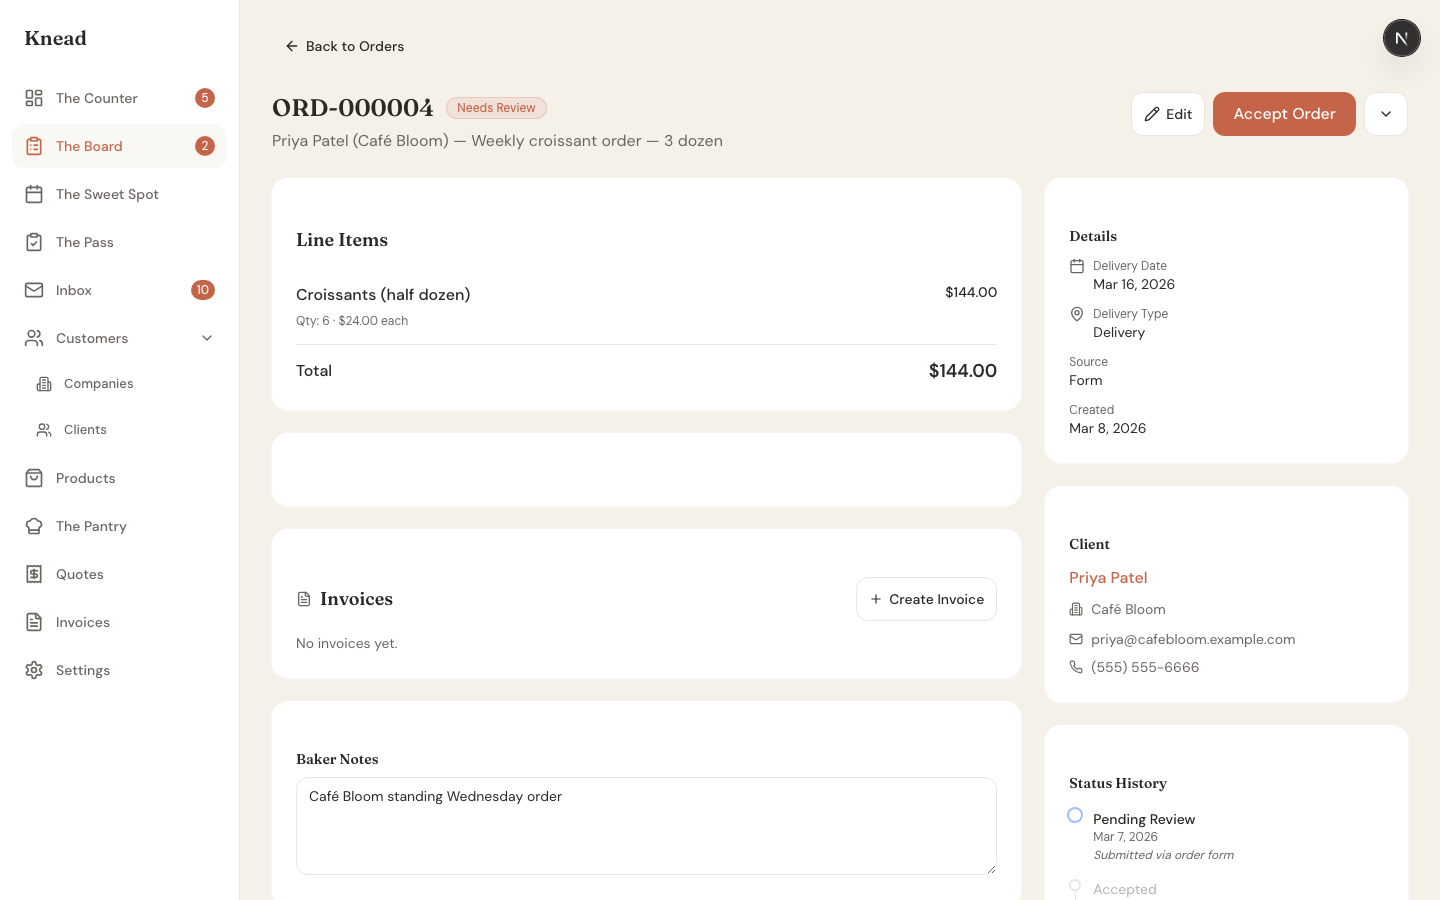 ## Stage 3: Accept the Enquiry
Once you are ready to take the order:
1. Tap **Accept** on the enquiry detail screen.
2. The status changes from **Enquiry** to **Accepted**.
The customer receives an email letting them know their order has been accepted. If the order does not work for you, you can decline it with an optional message.
Pro tip: Accept or decline enquiries within 24 hours. Fast responses build trust and lead to repeat customers.
## Stage 4: Send an Invoice
With the order accepted, it is time to get paid.
1. Tap **Create Invoice** on the order detail screen.
2. Review the line items. Knead pre-fills them from the order details.
3. Adjust quantities, add extras, or apply discounts if needed.
4. Tap **Send Invoice**.
The customer receives the invoice by email with a link to pay online. If you have Stripe connected, they can pay by card immediately.
## Stage 3: Accept the Enquiry
Once you are ready to take the order:
1. Tap **Accept** on the enquiry detail screen.
2. The status changes from **Enquiry** to **Accepted**.
The customer receives an email letting them know their order has been accepted. If the order does not work for you, you can decline it with an optional message.
Pro tip: Accept or decline enquiries within 24 hours. Fast responses build trust and lead to repeat customers.
## Stage 4: Send an Invoice
With the order accepted, it is time to get paid.
1. Tap **Create Invoice** on the order detail screen.
2. Review the line items. Knead pre-fills them from the order details.
3. Adjust quantities, add extras, or apply discounts if needed.
4. Tap **Send Invoice**.
The customer receives the invoice by email with a link to pay online. If you have Stripe connected, they can pay by card immediately.
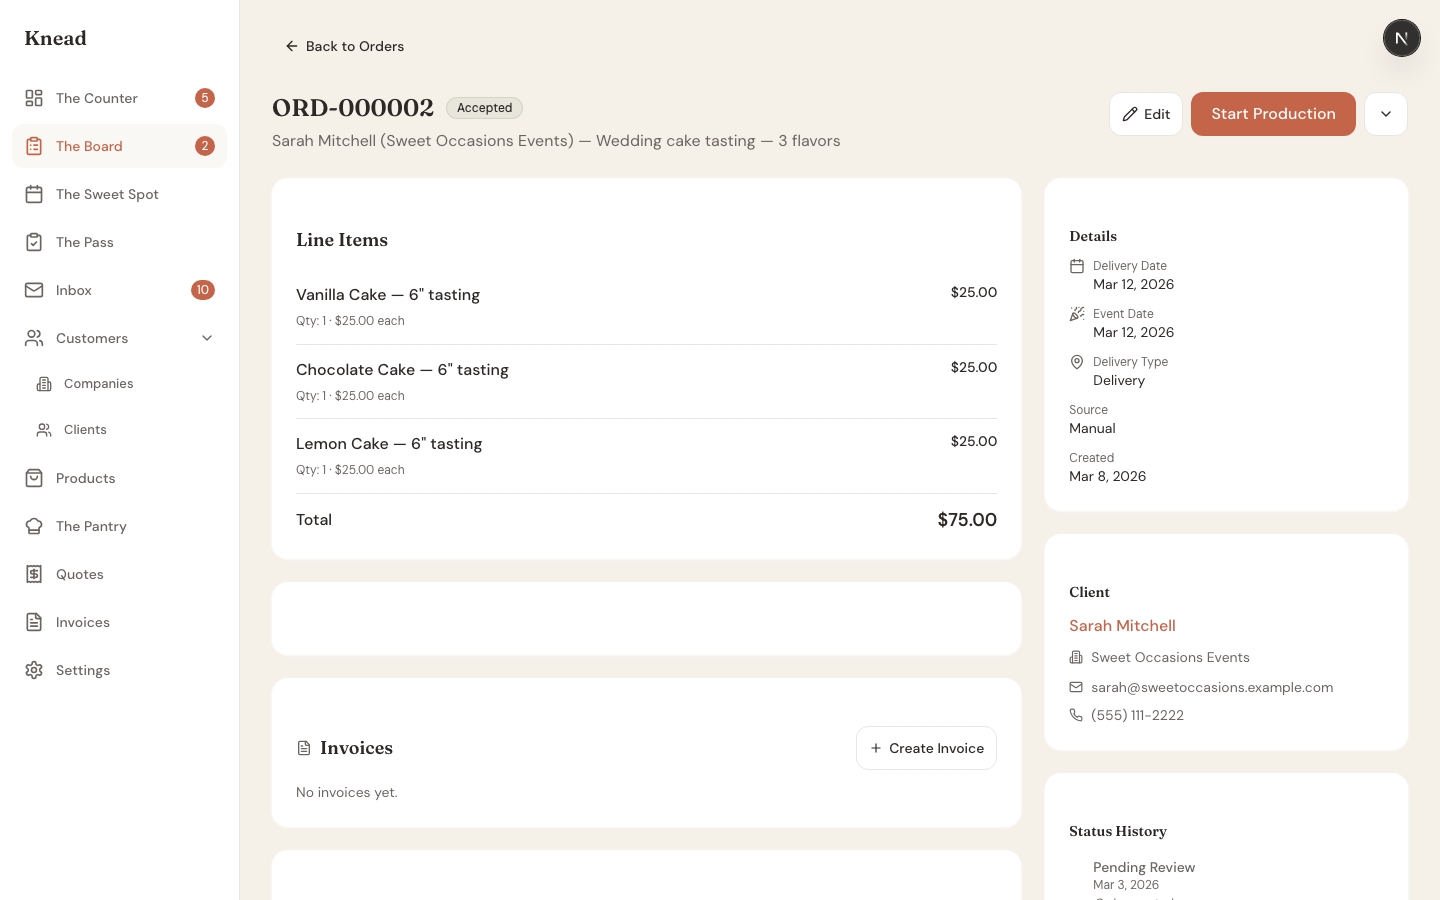 ## Stage 5: Customer Pays
When the customer pays through the invoice link, the order status automatically updates to **Paid**. You receive a notification confirming payment.
If you accept cash, check, or other offline payments, you can manually mark the invoice as paid.
Good to know: You can require a deposit upfront and collect the balance later. See the invoicing guide for deposit setup.
## Stage 6: Move to Production
When bake day arrives:
1. Open the order and tap **Start Production**.
2. The status changes to **In Production**.
This is your signal that the order is actively being worked on. If you use The Pass, this order now appears in your production checklist for the day.
## Stage 7: Mark Complete
Once everything is baked, packaged, and ready:
1. Tap **Mark Complete** on the order.
2. The status changes to **Complete**.
The customer receives a notification that their order is ready. If delivery is involved, coordinate the handoff from here.
## Stage 5: Customer Pays
When the customer pays through the invoice link, the order status automatically updates to **Paid**. You receive a notification confirming payment.
If you accept cash, check, or other offline payments, you can manually mark the invoice as paid.
Good to know: You can require a deposit upfront and collect the balance later. See the invoicing guide for deposit setup.
## Stage 6: Move to Production
When bake day arrives:
1. Open the order and tap **Start Production**.
2. The status changes to **In Production**.
This is your signal that the order is actively being worked on. If you use The Pass, this order now appears in your production checklist for the day.
## Stage 7: Mark Complete
Once everything is baked, packaged, and ready:
1. Tap **Mark Complete** on the order.
2. The status changes to **Complete**.
The customer receives a notification that their order is ready. If delivery is involved, coordinate the handoff from here.
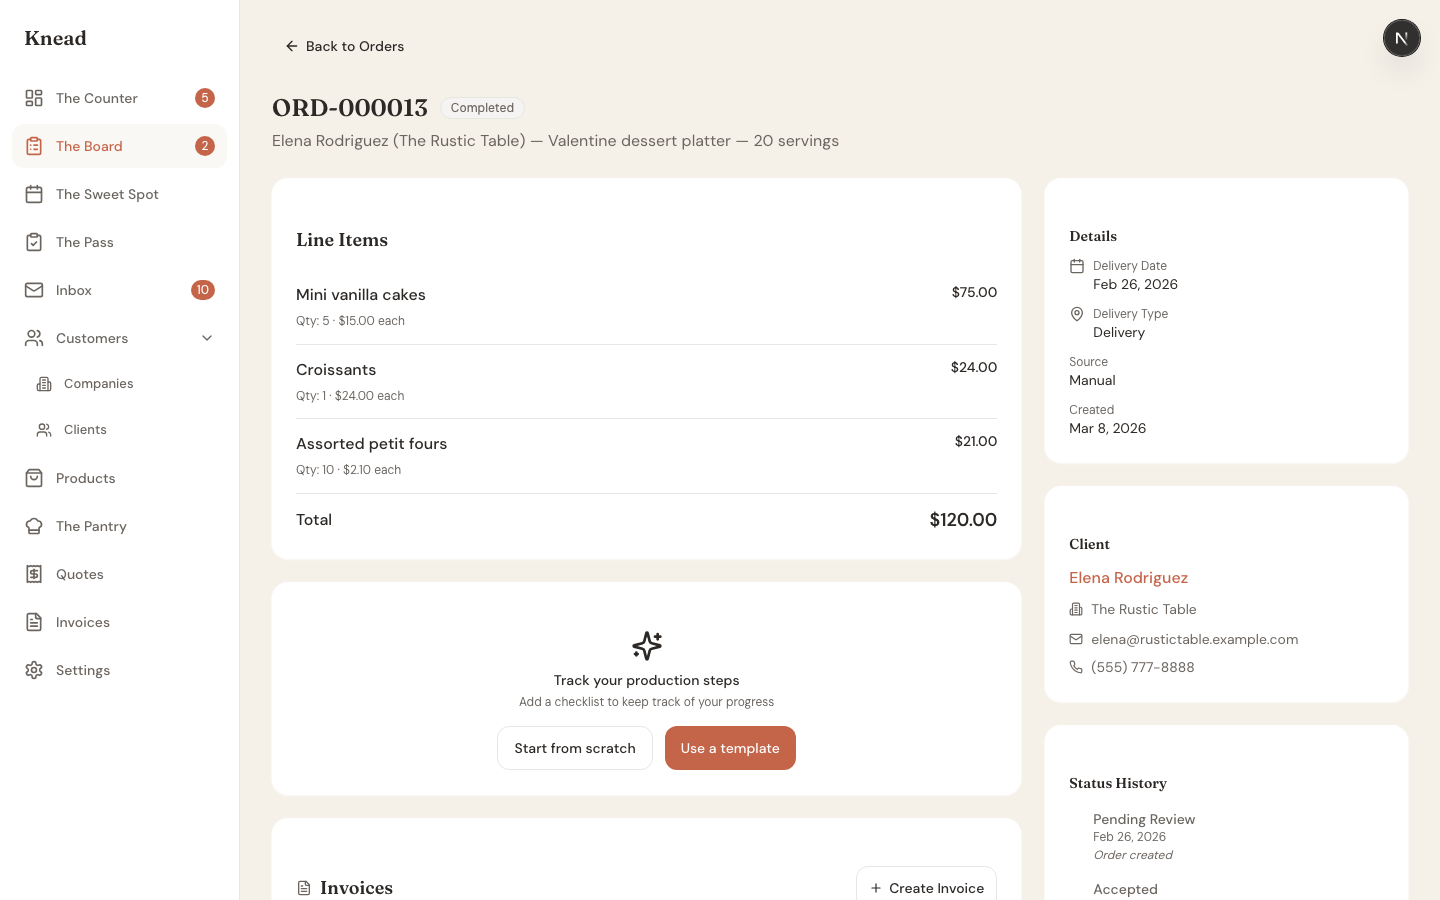 ## The Full Status Flow
Here is the complete progression at a glance:
1. **Enquiry** — Customer submitted, waiting for your review.
2. **Accepted** — You confirmed you can fulfill the order.
3. **Invoiced** — Invoice sent, waiting for payment.
4. **Paid** — Payment received.
5. **In Production** — You are baking.
6. **Complete** — Order fulfilled and delivered or picked up.
Each status change triggers a customer notification so they always know where things stand. For a full breakdown of every status and what it means, see [order statuses explained](/managing-orders/order-statuses-explained).
Pro tip: Use The Counter each morning to see which orders need action. It surfaces orders that are waiting for your next step.
## Related Articles
* [Understanding The Counter](/understanding-the-counter)
* [Order Statuses Explained](/managing-orders/order-statuses-explained)
* [Creating and Sending Invoices](/invoicing-and-payments/creating-and-sending-invoices)
* [Using The Pass](/production/using-the-pass)
* [Reviewing and Accepting Enquiries](/managing-orders/reviewing-and-accepting-enquiries)
***
*Still need help? [Contact us](mailto:hello@kneadapp.co)*
## The Full Status Flow
Here is the complete progression at a glance:
1. **Enquiry** — Customer submitted, waiting for your review.
2. **Accepted** — You confirmed you can fulfill the order.
3. **Invoiced** — Invoice sent, waiting for payment.
4. **Paid** — Payment received.
5. **In Production** — You are baking.
6. **Complete** — Order fulfilled and delivered or picked up.
Each status change triggers a customer notification so they always know where things stand. For a full breakdown of every status and what it means, see [order statuses explained](/managing-orders/order-statuses-explained).
Pro tip: Use The Counter each morning to see which orders need action. It surfaces orders that are waiting for your next step.
## Related Articles
* [Understanding The Counter](/understanding-the-counter)
* [Order Statuses Explained](/managing-orders/order-statuses-explained)
* [Creating and Sending Invoices](/invoicing-and-payments/creating-and-sending-invoices)
* [Using The Pass](/production/using-the-pass)
* [Reviewing and Accepting Enquiries](/managing-orders/reviewing-and-accepting-enquiries)
***
*Still need help? [Contact us](mailto:hello@kneadapp.co)*