> ## Documentation Index
> Fetch the complete documentation index at: https://help.kneadapp.co/llms.txt
> Use this file to discover all available pages before exploring further.
# The Onboarding Wizard
> Get set up in minutes with the guided onboarding flow.
## Overview
When you sign up for Knead, the onboarding wizard walks you through five steps to set up your bakery. It takes a few minutes and gets you ready to accept your first order.
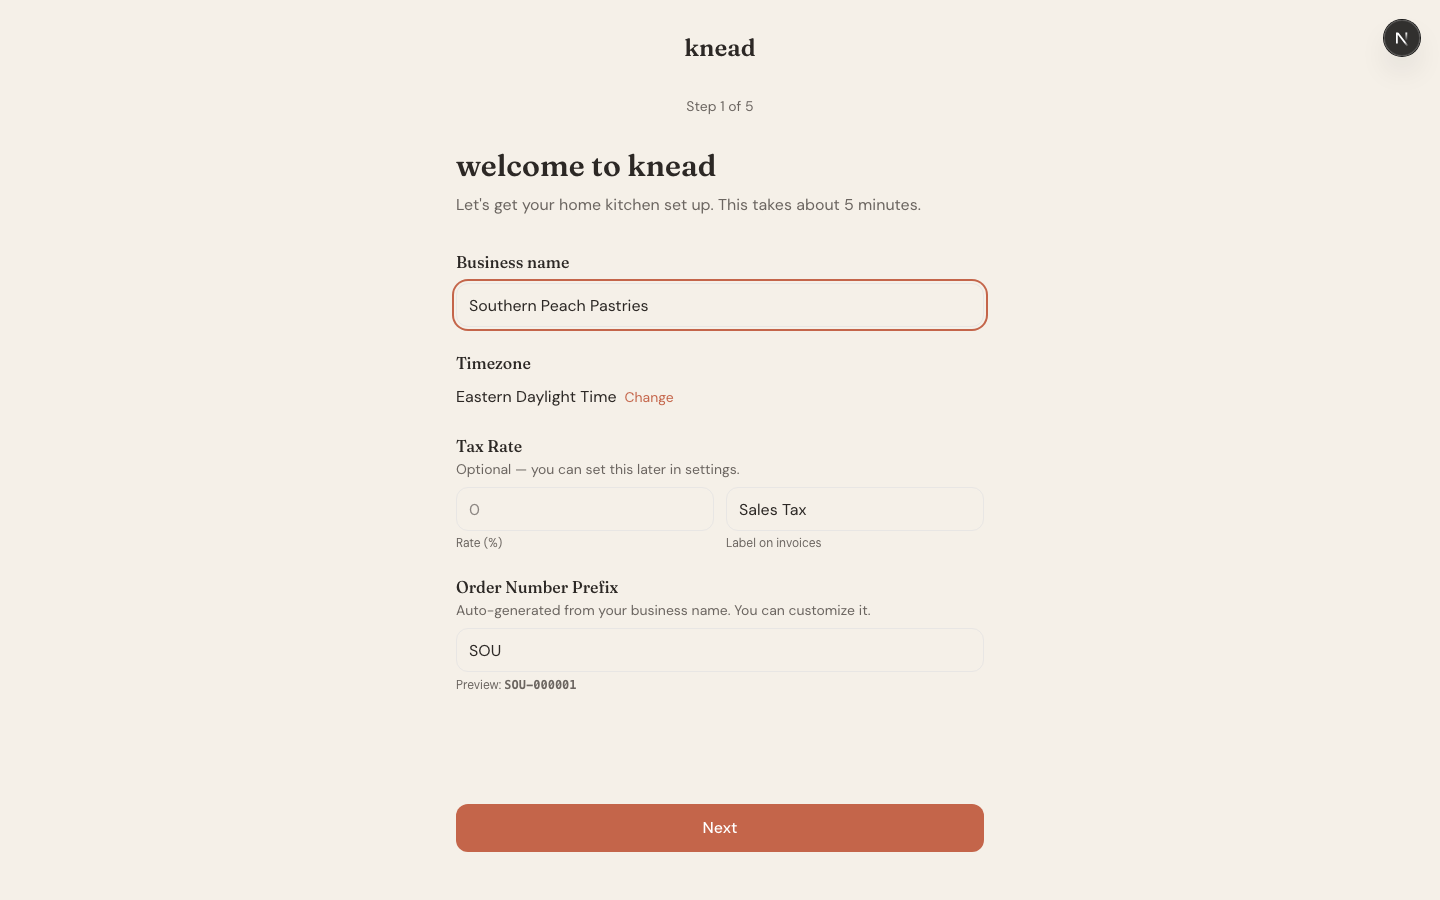 ## Step 1: Welcome — Your Business Details
The wizard starts by collecting the basics:
1. Enter your **business name**. This is what customers see on The Board, quotes, and invoices.
2. Select your **timezone**. Knead uses this to display order dates, production schedules, and capacity in your local time. All data is stored in UTC and converted for display.
Tap **Next** to continue.
Good to know: You can change your business name and timezone later in Settings. Get it close enough for now and move on.
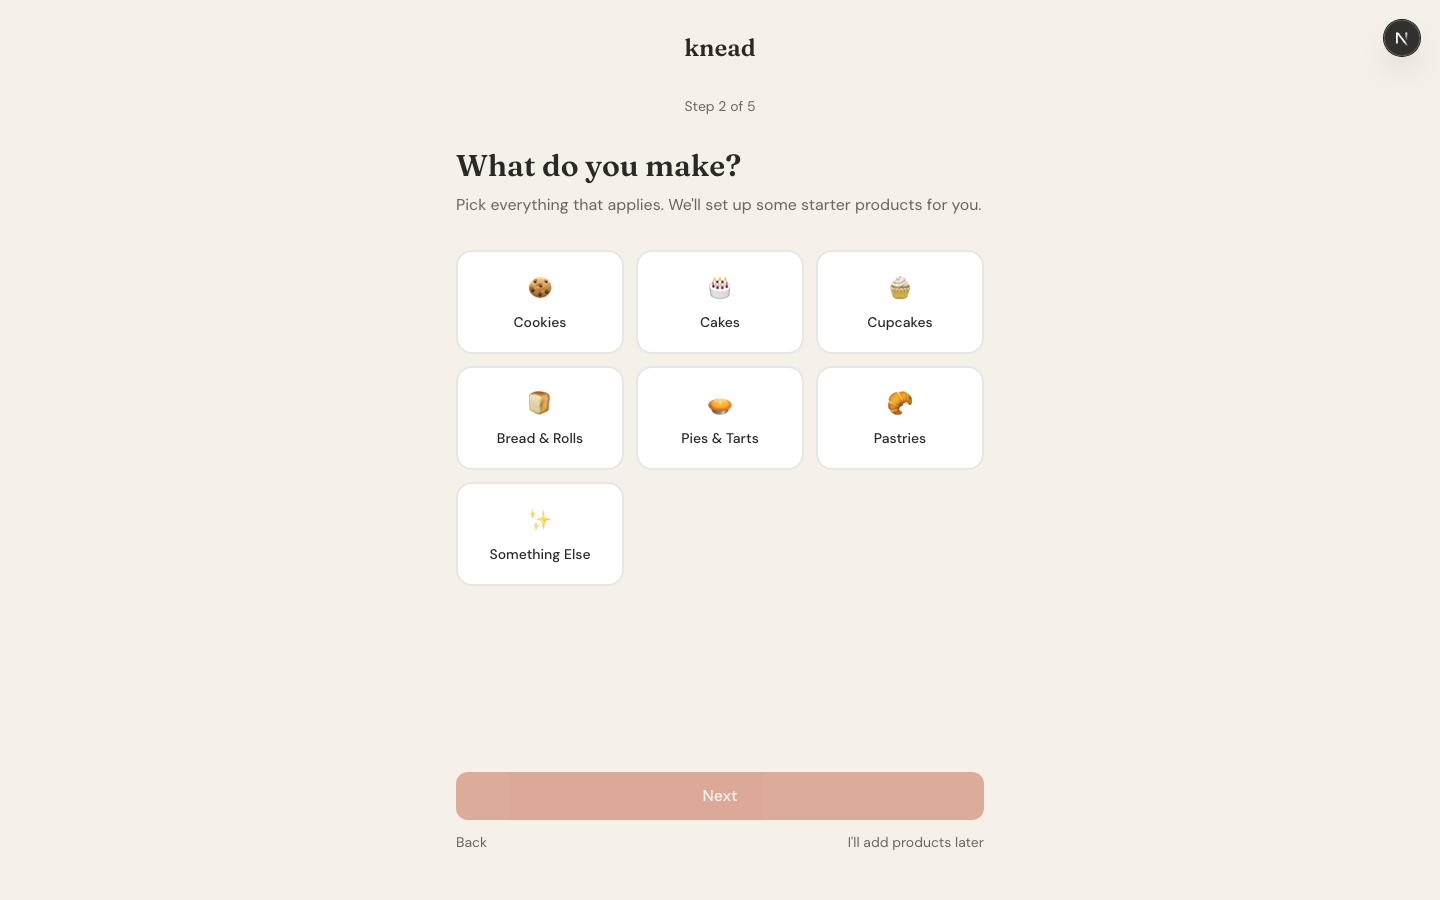
## Step 2: Select Your Product Categories
Knead asks what kind of baked goods you make. Choose one or more categories that match your bakery:
* Cakes
* Cupcakes
* Cookies
* Bread
* Pastries
* Pies
* Other
Your selections help Knead seed your account with **starter product templates** tailored to your categories. These templates give you a head start on building your product catalog.
Tap **Next** after selecting your categories.
## Step 1: Welcome — Your Business Details
The wizard starts by collecting the basics:
1. Enter your **business name**. This is what customers see on The Board, quotes, and invoices.
2. Select your **timezone**. Knead uses this to display order dates, production schedules, and capacity in your local time. All data is stored in UTC and converted for display.
Tap **Next** to continue.
Good to know: You can change your business name and timezone later in Settings. Get it close enough for now and move on.
## Step 2: Select Your Product Categories
Knead asks what kind of baked goods you make. Choose one or more categories that match your bakery:
* Cakes
* Cupcakes
* Cookies
* Bread
* Pastries
* Pies
* Other
Your selections help Knead seed your account with **starter product templates** tailored to your categories. These templates give you a head start on building your product catalog.
Tap **Next** after selecting your categories.
 Pro tip: Select every category you plan to offer, even if you are not ready to list those products yet. The starter templates are helpful reference points you can customize later.
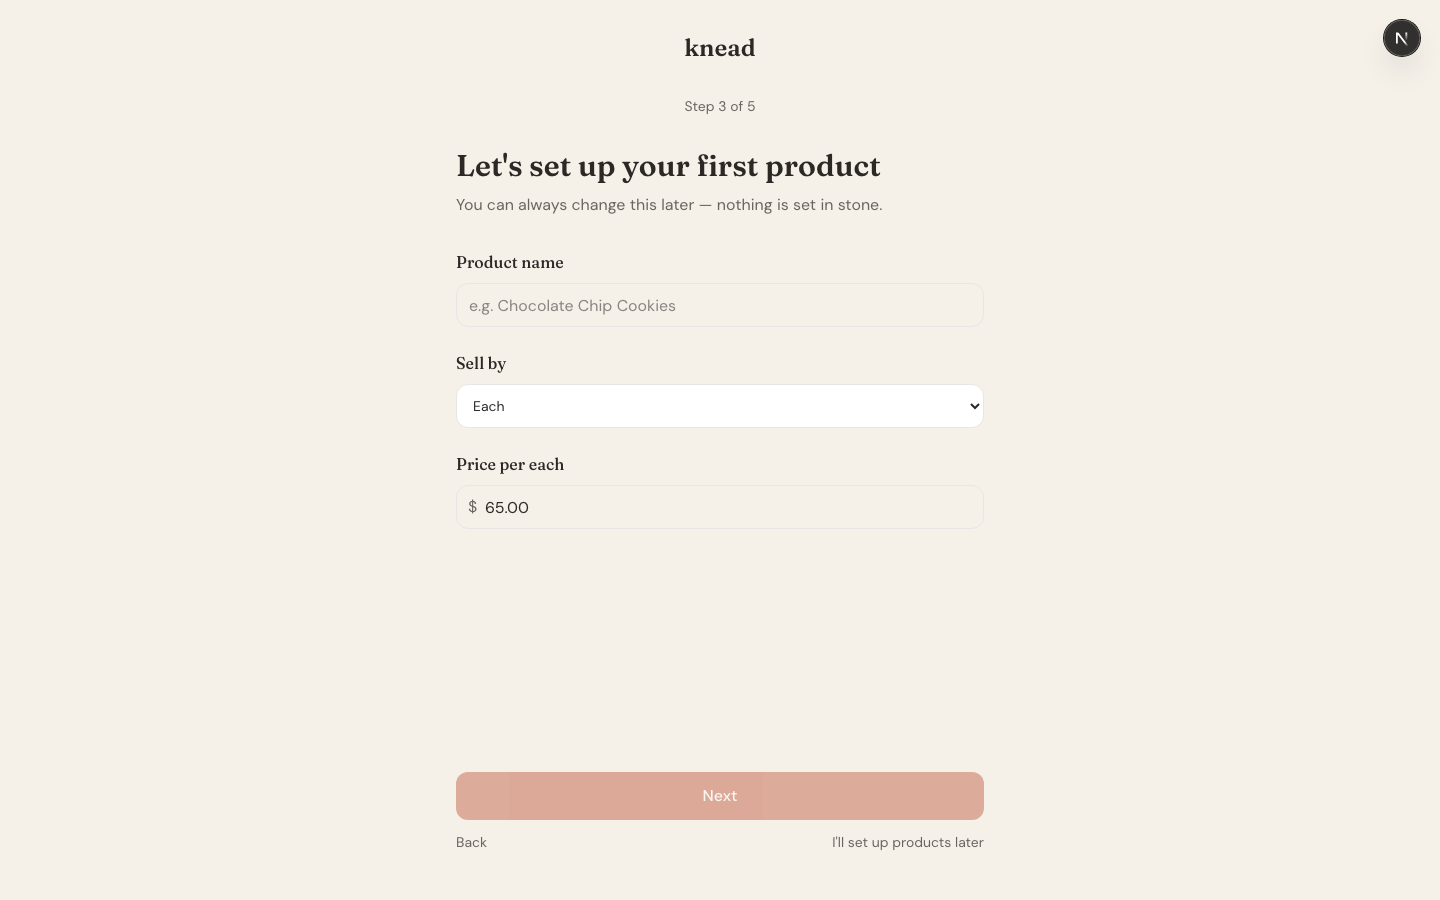
## Step 3: Create Your First Product
The wizard walks you through creating your first product right away:
1. Enter a **product name** (for example, "Chocolate Chip Cookies" or "Classic Vanilla Cake").
2. Add a **description** that tells customers what they are getting.
3. Choose a **sell unit** — how you price and sell this product (each, dozen, half dozen, box, loaf, or batch).
4. Set your **base price** for one sell unit.
This product is added to your catalog and appears on The Board as soon as you finish the wizard.
Pro tip: Select every category you plan to offer, even if you are not ready to list those products yet. The starter templates are helpful reference points you can customize later.
## Step 3: Create Your First Product
The wizard walks you through creating your first product right away:
1. Enter a **product name** (for example, "Chocolate Chip Cookies" or "Classic Vanilla Cake").
2. Add a **description** that tells customers what they are getting.
3. Choose a **sell unit** — how you price and sell this product (each, dozen, half dozen, box, loaf, or batch).
4. Set your **base price** for one sell unit.
This product is added to your catalog and appears on The Board as soon as you finish the wizard.
 ## Step 4: Add a Recipe
After creating your product, the wizard prompts you to add a recipe. This connects your product to The Pantry for ingredient tracking and cost calculations.
1. Tap **Add Ingredient**.
2. Start typing an ingredient name. A type-ahead dropdown appears with suggestions.
3. Select an existing ingredient or create a new one on the fly.
4. Enter the **quantity** and **unit** (for example, 2 cups flour, 3 eggs).
5. Repeat for each ingredient in your recipe.
Knead pre-seeds your account with six common baking ingredients: **flour, sugar, salt, butter, eggs, and milk**. These are ready to use in the type-ahead immediately. Any new ingredient you type is created automatically and added to The Pantry.
Good to know: Adding a recipe during onboarding is optional. You can skip this step and add recipes later from the product detail page. But doing it now gives you a complete product with cost tracking from day one.
## Step 5: Celebration
You did it. The final screen confirms your bakery is set up and ready to go. From here you can:
* **Go to The Counter** to see your dashboard.
* **Share The Board** to start accepting orders from customers.
* **Add more products** to build out your catalog.
Your starter product templates (based on the categories you selected in Step 2) are already in your catalog. Your default ingredients are created and waiting in The Pantry. You are ready to start taking orders.
Pro tip: Your next step after the wizard is to share your Board link with a few customers. Head to The Board settings and copy your unique order link.
## Related Articles
* [Quickstart](/knead-help)
* [Setting Up Your Bakery Profile](/setting-up-your-bakery-profile)
* [Creating Your First Product](/creating-your-first-product)
* [Your First Order — End to End](/your-first-order-end-to-end)
***
*Still need help? [Contact us](mailto:hello@kneadapp.co)*
## Step 4: Add a Recipe
After creating your product, the wizard prompts you to add a recipe. This connects your product to The Pantry for ingredient tracking and cost calculations.
1. Tap **Add Ingredient**.
2. Start typing an ingredient name. A type-ahead dropdown appears with suggestions.
3. Select an existing ingredient or create a new one on the fly.
4. Enter the **quantity** and **unit** (for example, 2 cups flour, 3 eggs).
5. Repeat for each ingredient in your recipe.
Knead pre-seeds your account with six common baking ingredients: **flour, sugar, salt, butter, eggs, and milk**. These are ready to use in the type-ahead immediately. Any new ingredient you type is created automatically and added to The Pantry.
Good to know: Adding a recipe during onboarding is optional. You can skip this step and add recipes later from the product detail page. But doing it now gives you a complete product with cost tracking from day one.
## Step 5: Celebration
You did it. The final screen confirms your bakery is set up and ready to go. From here you can:
* **Go to The Counter** to see your dashboard.
* **Share The Board** to start accepting orders from customers.
* **Add more products** to build out your catalog.
Your starter product templates (based on the categories you selected in Step 2) are already in your catalog. Your default ingredients are created and waiting in The Pantry. You are ready to start taking orders.
Pro tip: Your next step after the wizard is to share your Board link with a few customers. Head to The Board settings and copy your unique order link.
## Related Articles
* [Quickstart](/knead-help)
* [Setting Up Your Bakery Profile](/setting-up-your-bakery-profile)
* [Creating Your First Product](/creating-your-first-product)
* [Your First Order — End to End](/your-first-order-end-to-end)
***
*Still need help? [Contact us](mailto:hello@kneadapp.co)*