> ## Documentation Index
> Fetch the complete documentation index at: https://help.kneadapp.co/llms.txt
> Use this file to discover all available pages before exploring further.
# Setting Up Your Bakery Profile
> Complete your bakery profile so customers see your business name, location, and hours on your order form.
## Overview
Your bakery profile controls what customers see when they visit The Board (your public order form). A complete profile builds trust and saves you from answering the same questions over and over.
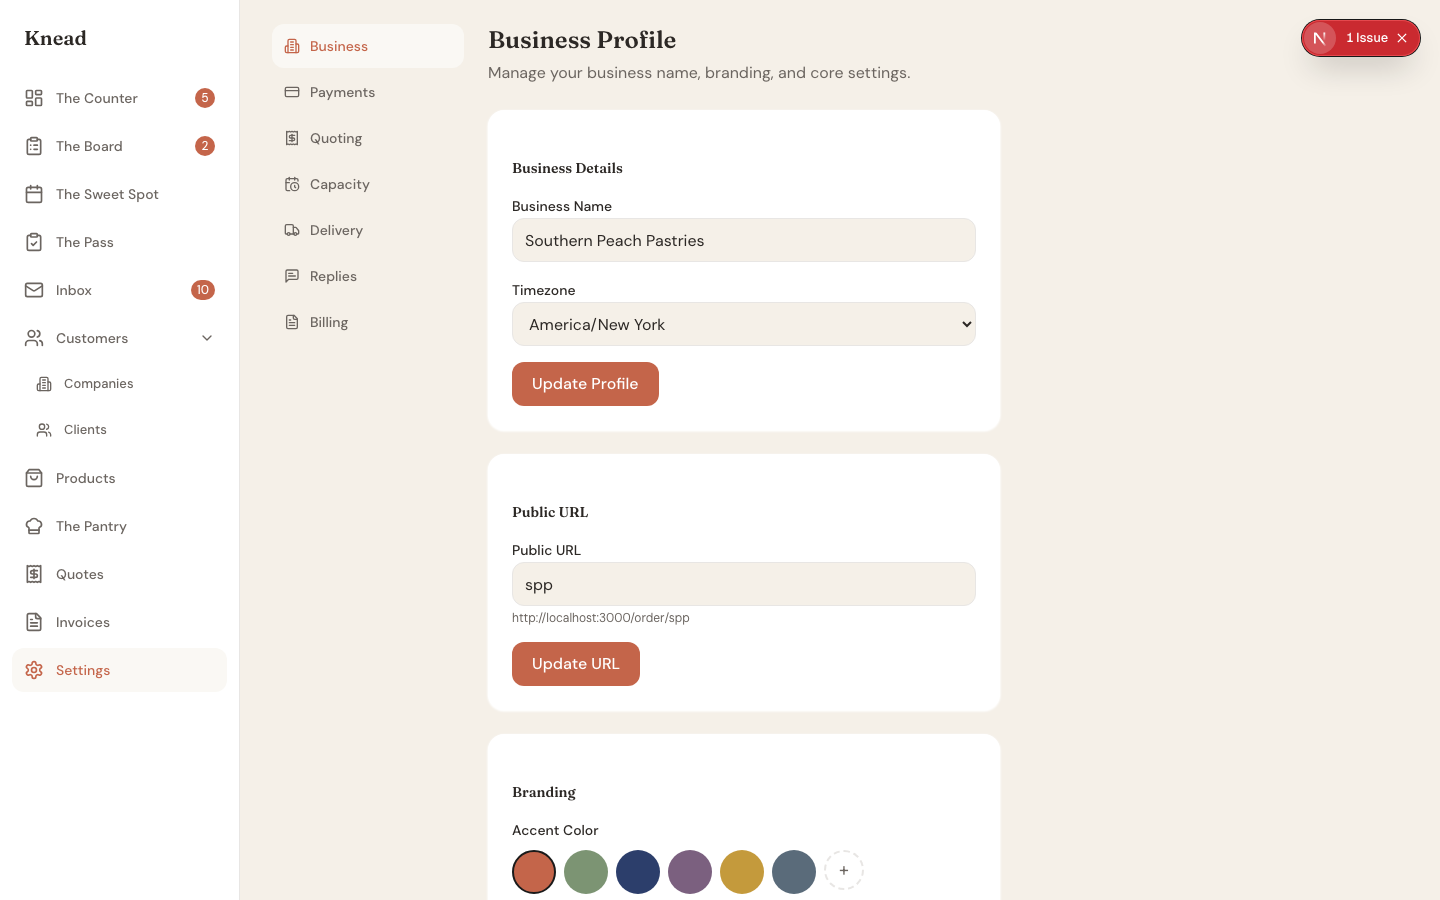 ## Step 1: Add Your Business Name
1. Tap **Settings** in the sidebar.
2. Tap **Bakery Profile**.
3. Enter your business name in the **Business Name** field.
This name appears at the top of The Board, on invoices, and in customer-facing emails. Use the name your customers already know you by.
Pro tip: If you operate under a cottage food license with a registered business name, use that name here for consistency.
## Step 2: Set Your Contact Information
1. In the same Bakery Profile screen, find the **Contact** section.
2. Enter your email address and phone number.
Your email is used for order notifications and customer replies. Your phone number is optional but helpful for day-of delivery coordination.
## Step 3: Define Your Location and Service Area
1. Scroll to the **Location** section.
2. Enter your city or general area.
3. Set your delivery radius or list the areas you serve.
You do not need to share your home address. A city or neighborhood name is enough. This tells customers whether you can deliver to them or where pickup happens.
Good to know: Your exact address is never displayed publicly. Only the city or area you enter is shown.
## Step 4: Set Your Business Hours
1. Scroll to the **Business Hours** section.
2. Toggle on the days you accept orders and fulfill deliveries.
3. Set your available hours for each active day.
Business hours tell customers when they can expect responses and when pickup or delivery is available. These hours also feed into The Sweet Spot so your capacity calendar stays accurate.
## Step 5: Customize Your Profile
1. Upload a **profile photo** or logo. This appears on The Board and invoices.
2. Add a short **bio or description**. One or two sentences about your bakery and what you specialize in works well.
## Step 1: Add Your Business Name
1. Tap **Settings** in the sidebar.
2. Tap **Bakery Profile**.
3. Enter your business name in the **Business Name** field.
This name appears at the top of The Board, on invoices, and in customer-facing emails. Use the name your customers already know you by.
Pro tip: If you operate under a cottage food license with a registered business name, use that name here for consistency.
## Step 2: Set Your Contact Information
1. In the same Bakery Profile screen, find the **Contact** section.
2. Enter your email address and phone number.
Your email is used for order notifications and customer replies. Your phone number is optional but helpful for day-of delivery coordination.
## Step 3: Define Your Location and Service Area
1. Scroll to the **Location** section.
2. Enter your city or general area.
3. Set your delivery radius or list the areas you serve.
You do not need to share your home address. A city or neighborhood name is enough. This tells customers whether you can deliver to them or where pickup happens.
Good to know: Your exact address is never displayed publicly. Only the city or area you enter is shown.
## Step 4: Set Your Business Hours
1. Scroll to the **Business Hours** section.
2. Toggle on the days you accept orders and fulfill deliveries.
3. Set your available hours for each active day.
Business hours tell customers when they can expect responses and when pickup or delivery is available. These hours also feed into The Sweet Spot so your capacity calendar stays accurate.
## Step 5: Customize Your Profile
1. Upload a **profile photo** or logo. This appears on The Board and invoices.
2. Add a short **bio or description**. One or two sentences about your bakery and what you specialize in works well.
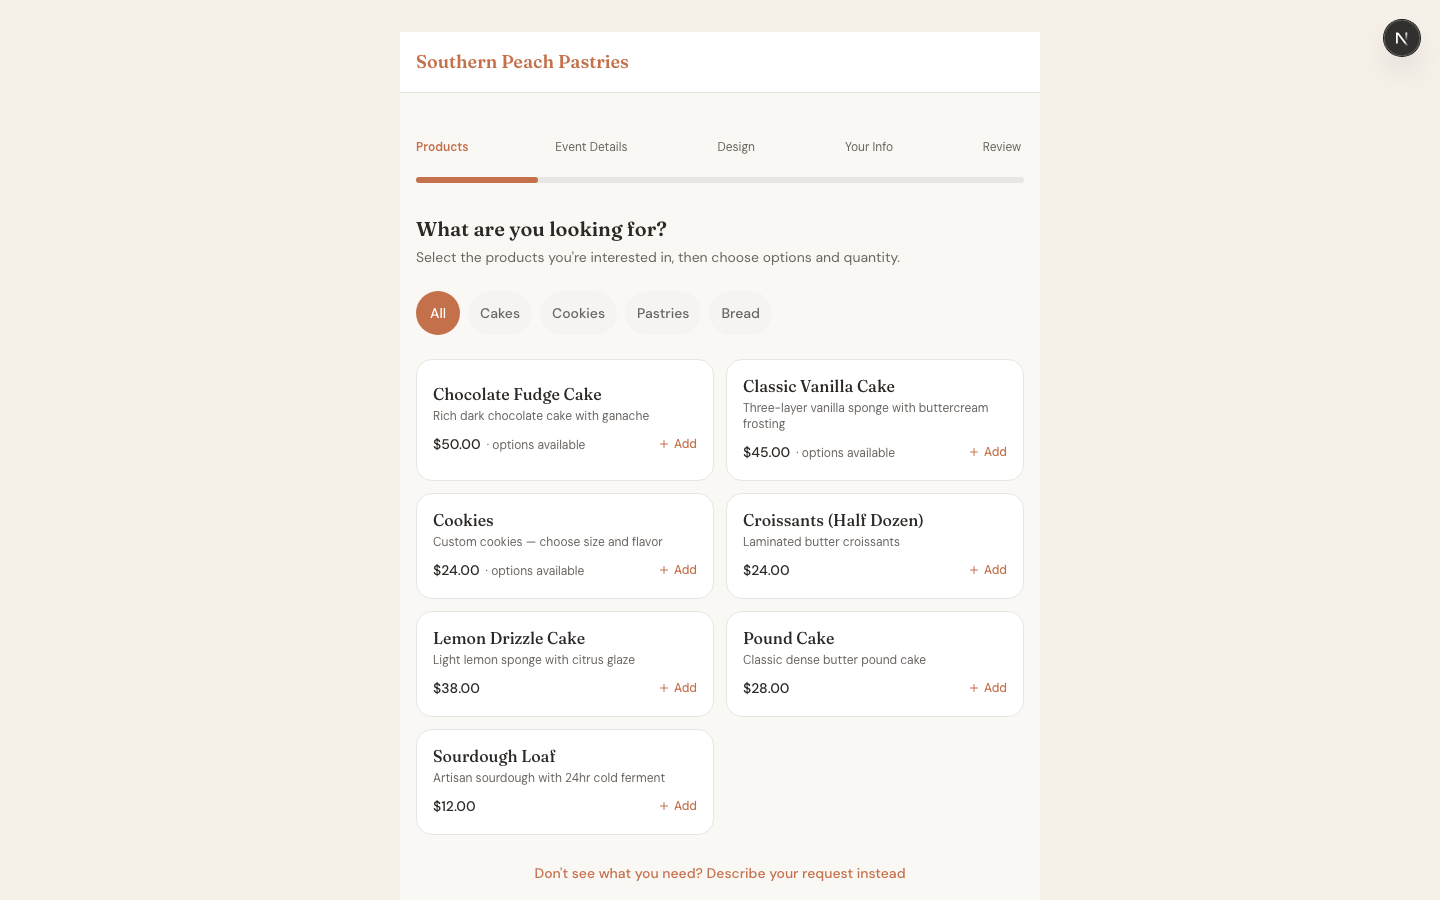 ## What Customers See
Everything you enter here flows directly to The Board. When a customer taps your order link, they see your business name, photo, bio, location, and hours before they browse your products. A filled-out profile means fewer questions and more confidence from first-time customers.
Pro tip: Preview your Board after completing your profile. Tap **View Board** in the sidebar to see exactly what customers see.
## Related Articles
* [Quickstart](/knead-help)
* [Creating Your First Product](/creating-your-first-product)
* [How The Board Works](/managing-orders/how-the-board-works)
* [Sharing Your Order Link](/managing-orders/sharing-your-order-link)
***
*Still need help? [Contact us](mailto:hello@kneadapp.co)*
## What Customers See
Everything you enter here flows directly to The Board. When a customer taps your order link, they see your business name, photo, bio, location, and hours before they browse your products. A filled-out profile means fewer questions and more confidence from first-time customers.
Pro tip: Preview your Board after completing your profile. Tap **View Board** in the sidebar to see exactly what customers see.
## Related Articles
* [Quickstart](/knead-help)
* [Creating Your First Product](/creating-your-first-product)
* [How The Board Works](/managing-orders/how-the-board-works)
* [Sharing Your Order Link](/managing-orders/sharing-your-order-link)
***
*Still need help? [Contact us](mailto:hello@kneadapp.co)*