> ## Documentation Index
> Fetch the complete documentation index at: https://help.kneadapp.co/llms.txt
> Use this file to discover all available pages before exploring further.
# Importing Clients from QuickBooks
> Bring your QuickBooks Online customer list into Knead by exporting to Excel and uploading the spreadsheet — no re-typing required.
## Overview
If you keep your customers in QuickBooks Online, you can bring them into Knead without re-typing names, emails, phone numbers, and addresses. This is a **spreadsheet import**: you export your customers from QuickBooks to Excel, then upload that file to Knead. There is no account connection or live sync — it is a one-time file upload you can repeat whenever you like.
## What Gets Imported
Knead reads the columns in your QuickBooks export and maps them to Knead's client fields:
| QuickBooks Field | Knead Field |
| ---------------- | ---------------------- |
| Display Name | First Name + Last Name |
| Email | Email |
| Phone | Phone |
| Billing Address | Mailing Address |
| Shipping Address | Delivery Address |
| Company Name | Company |
Good to know: This is a one-time import of the file you upload. Knead does not sync ongoing changes with QuickBooks. When you add new customers in QuickBooks later, export again and re-import to bring them in.
## Step 1 — Export Your Customers from QuickBooks Online
1. In QuickBooks Online, open **Customers**.
2. Tap **Export**.
3. Choose **Export to Excel**.
4. Save the `.xlsx` file somewhere you can find it.
Pro tip: Clean up your customer list in QuickBooks before exporting. Removing duplicates and inactive customers there is easier than deleting them in Knead after the import.
## Step 2 — Upload the File to Knead
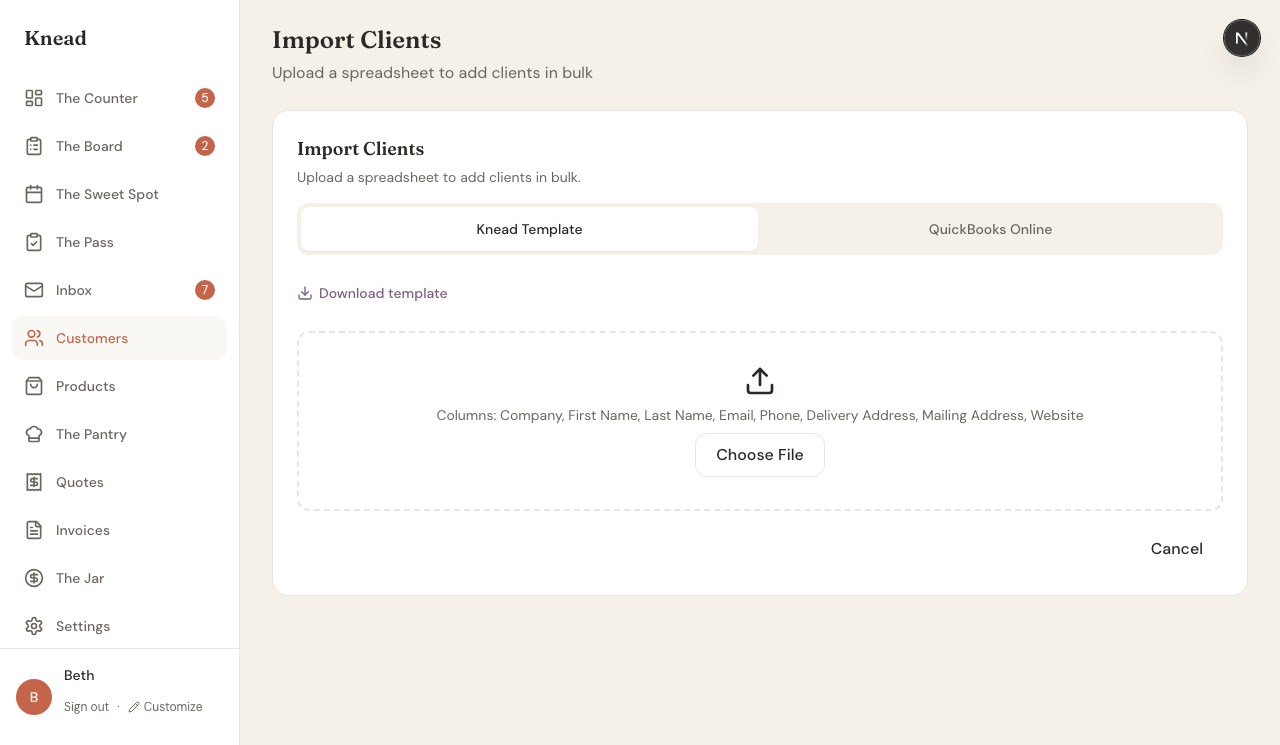
1. Tap **Customers** in the sidebar.
2. Tap **Import Clients**.
3. Tap the **QuickBooks Online** tab.
4. Follow the on-screen export steps if you need a reminder of how to get your file.
5. Upload the `.xlsx` file you exported.
6. Review the clients Knead found. Clients with incomplete data are flagged.
7. Tap **Import** to save them to your Knead account.
 ## After Importing
Imported clients appear in your client list immediately. You can then:
* Add [tags](/customers/client-tags) to organize them.
* Add [allergy notes](/customers/client-notes-and-allergy-tracking) for clients with dietary needs.
* Link clients to [companies](/customers/company-and-corporate-clients).
* Mark top buyers as [priority customers](/customers/priority-customers).
## Troubleshooting
**Import skips some customers** — Customers with incomplete addresses may be skipped to prevent validation errors. Add their details manually after import.
**Some columns did not map** — Make sure you exported with **Export to Excel** so the column headers match what Knead expects. If a field is missing, add it in QuickBooks (or in the spreadsheet) and re-upload.
## Related Articles
* [Importing Clients](/customers/importing-clients)
* [Your Client List](/customers/your-client-list)
* [Company and Corporate Clients](/customers/company-and-corporate-clients)
***
*Still need help? [Contact us](mailto:hello@kneadapp.co)*
## After Importing
Imported clients appear in your client list immediately. You can then:
* Add [tags](/customers/client-tags) to organize them.
* Add [allergy notes](/customers/client-notes-and-allergy-tracking) for clients with dietary needs.
* Link clients to [companies](/customers/company-and-corporate-clients).
* Mark top buyers as [priority customers](/customers/priority-customers).
## Troubleshooting
**Import skips some customers** — Customers with incomplete addresses may be skipped to prevent validation errors. Add their details manually after import.
**Some columns did not map** — Make sure you exported with **Export to Excel** so the column headers match what Knead expects. If a field is missing, add it in QuickBooks (or in the spreadsheet) and re-upload.
## Related Articles
* [Importing Clients](/customers/importing-clients)
* [Your Client List](/customers/your-client-list)
* [Company and Corporate Clients](/customers/company-and-corporate-clients)
***
*Still need help? [Contact us](mailto:hello@kneadapp.co)*